PMGS StampFix
Automatically rotate & crop stamp scans
Download links and demos can be found here.
If you have any questions, recommendations, feature requests, or bug reports, please use the contact form in the footer if this page to let me know.
Also, if you have an scan which you’re unable to successfully process, please let me know. If you send me the scan, I can usually find the correct settings to make it work.
Using the App
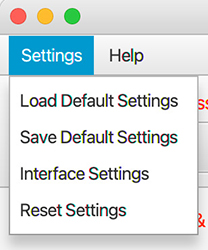
Load Default Settings
Load the default stamp processing settings.
Save Default Settings
Save the current stamp processing settings as the new defaults.
Reset Settings
Reset all app settings, to include interface settings and stamp processing settings, to the original installation settings.
Interface Settings
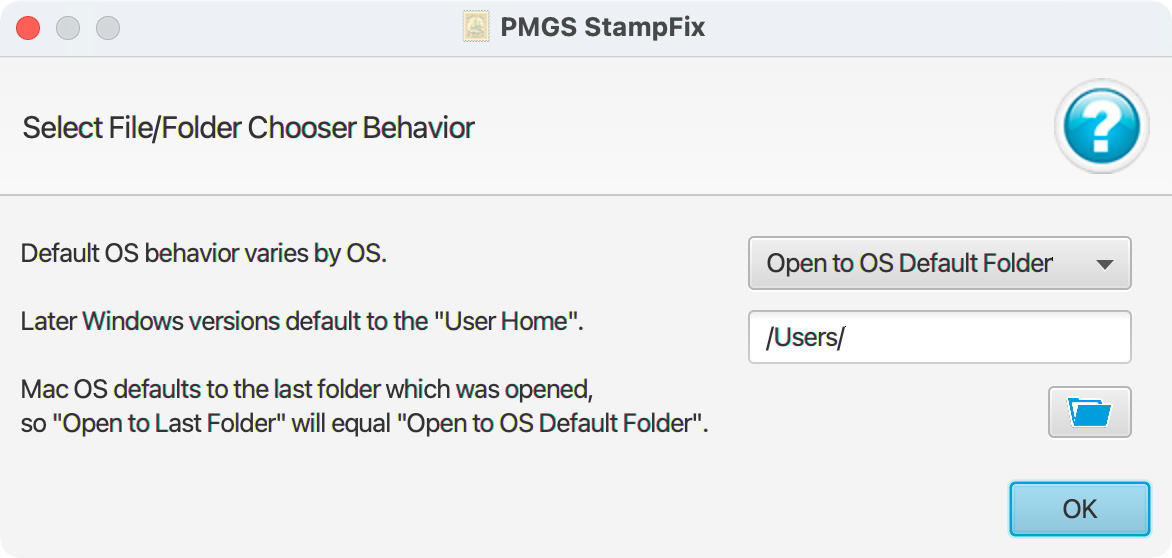
Change the manner in which the file/folder selection window behaves.
When you click a button to load a file or folder, the default location to which the file/folder selection window opens will vary based upon your operating system. This setting allows you to change the default folder to which the window opens to the location of your choice.
Open to OS Default Folder — in Windows, the file/folder selection window will default to the User Home folder, and in MacOS, it will open to the last opened folder.
Open to User Default Folder — allows the user to set the folder to which the file/folder selection window will open. To do so, click the button and select the desired folder, and it will be reflected im the white blank.
Open to Last Folder — opens the file/folder selection window to the last opened folder. Because this is already the default behavior in MacOS, this option has no effect on a Mac.
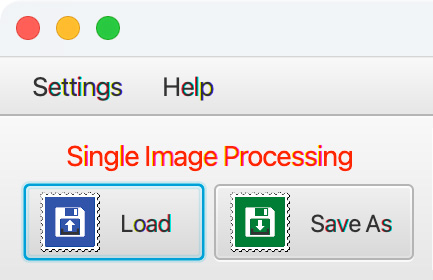
Single Image Processing
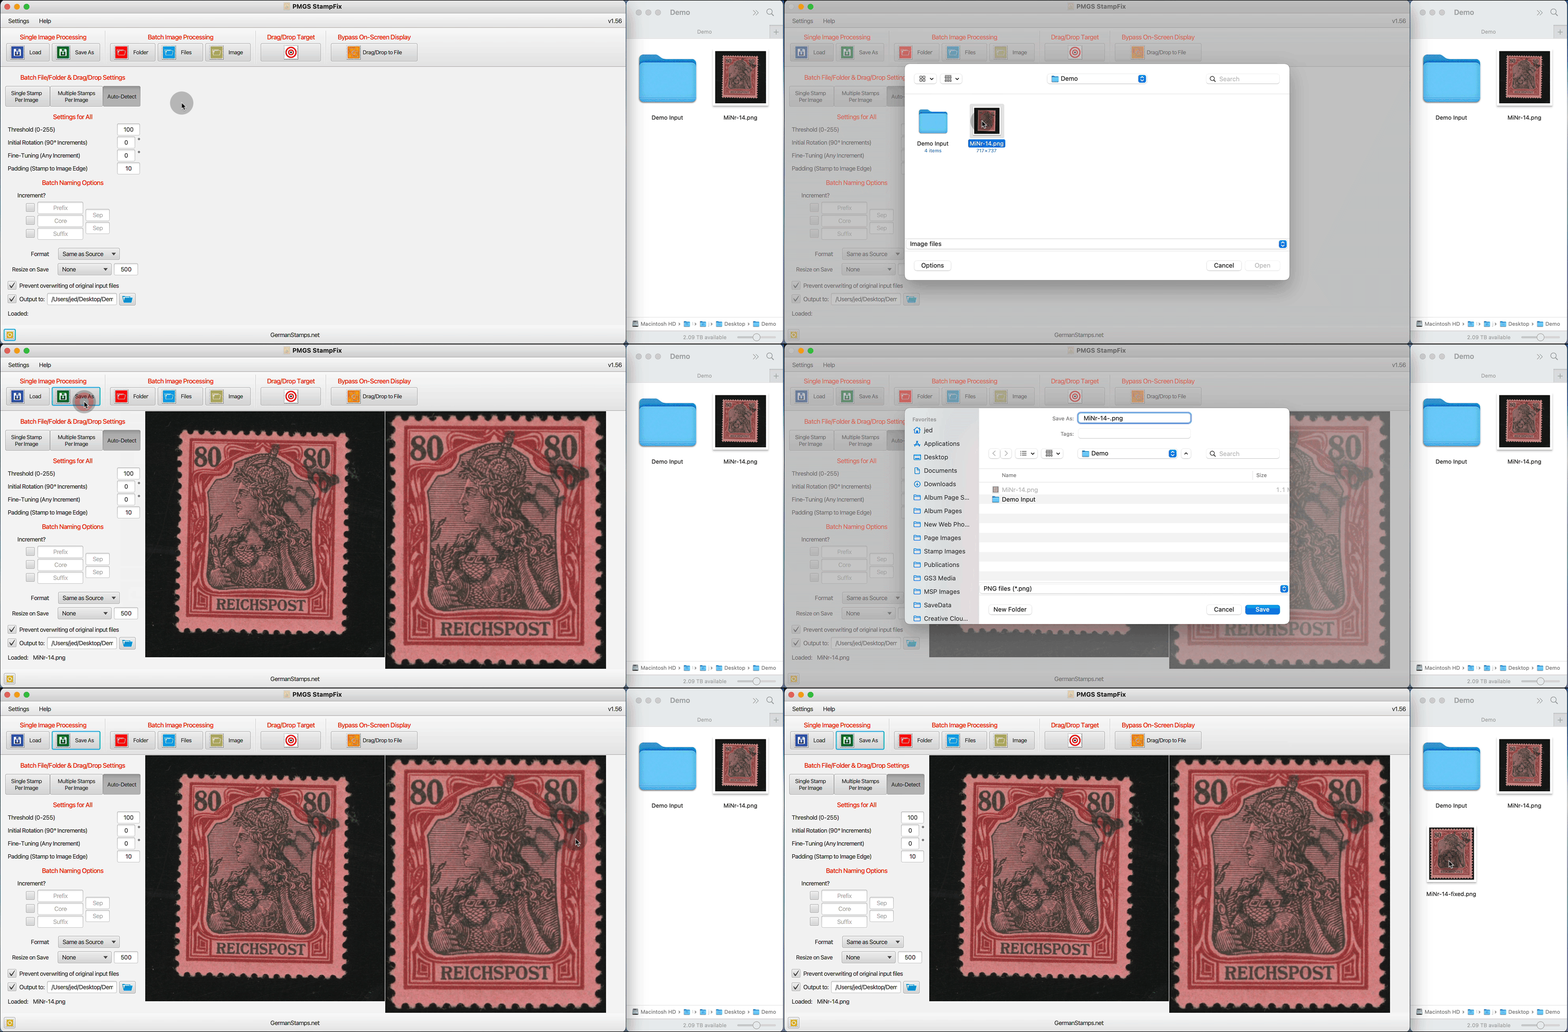
This function loads and processes a single image of a single stamp
Load
Opens the file selection window to load an image.
The app will then use the stamp processing settings to process the stamp (see desciption of these settings here). The result is displayed on the right side of the app.
Save As
Allows you to save the resulting image.
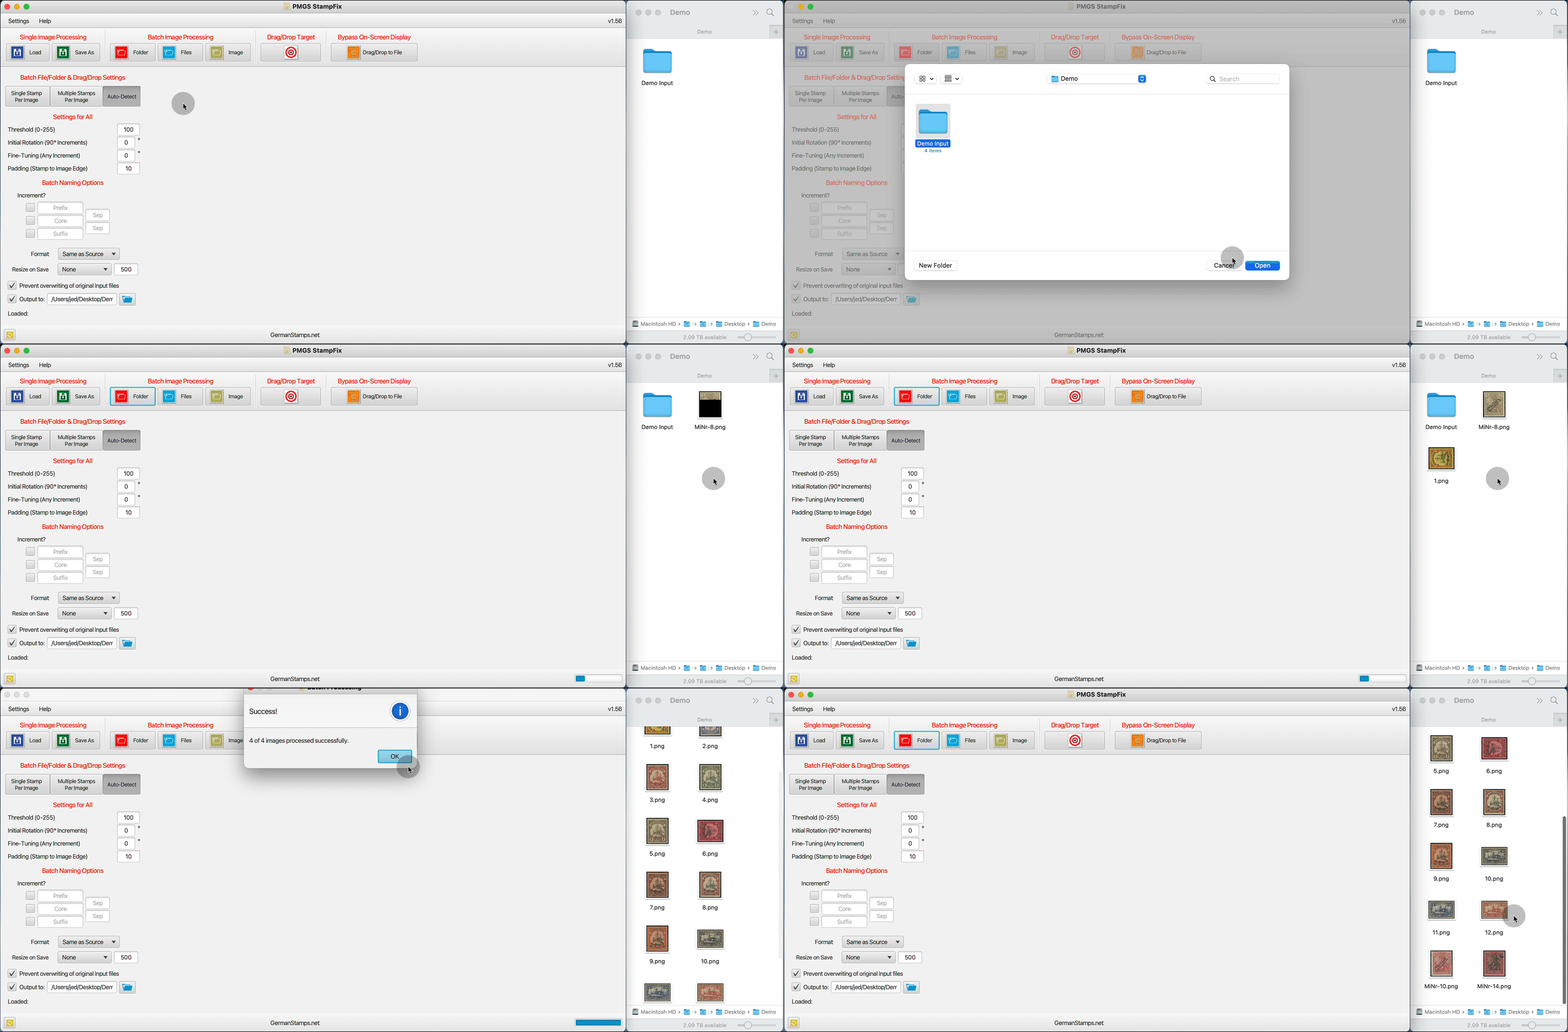
Batch Image Processing — Folder
This function loads and processes all files within a folder.
The app will then use the stamp processing settings to process all images within the folder (see desciption of these settings here). The results are not displayed in the app, but rather saved directly to file.
This function can be used to process both images containing a single stamp, and those in which there are multiple stamps, extracting each stamp as its own image, all in a single step. However, if the folder contains a mixture of the two types, it’s critical that the Auto-Detect button is selected (see description of this setting here).
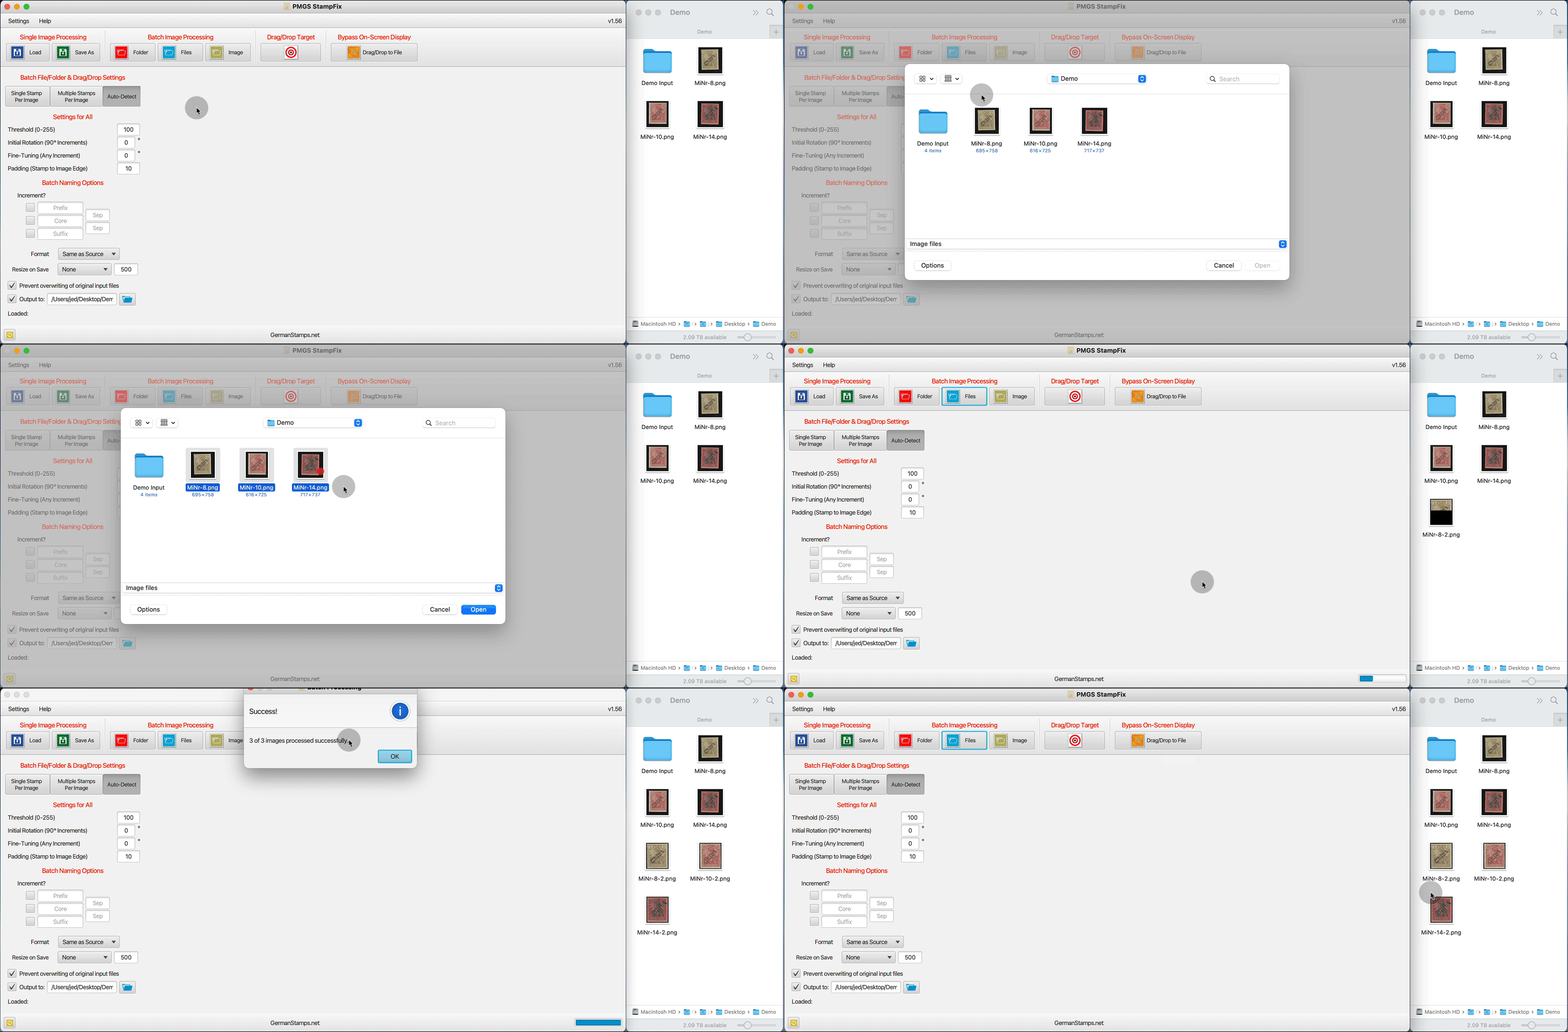
Batch Image Processing — Files
This function loads and processes multiple selected files at once.
The app will then use the stamp processing settings to process all selected images (see desciption of these settings here). The results are not displayed in the app, but rather saved directly to file.
This function can be used to process both images containing a single stamp, and those in which there are multiple stamps, extracting each stamp as its own image, all in a single step. However, if the folder contains a mixture of the two types, it’s critical that the Auto-Detect button is selected (see description of this setting here).
Batch Image Processing — Image
This function extracts multiple stamps from a single scan.
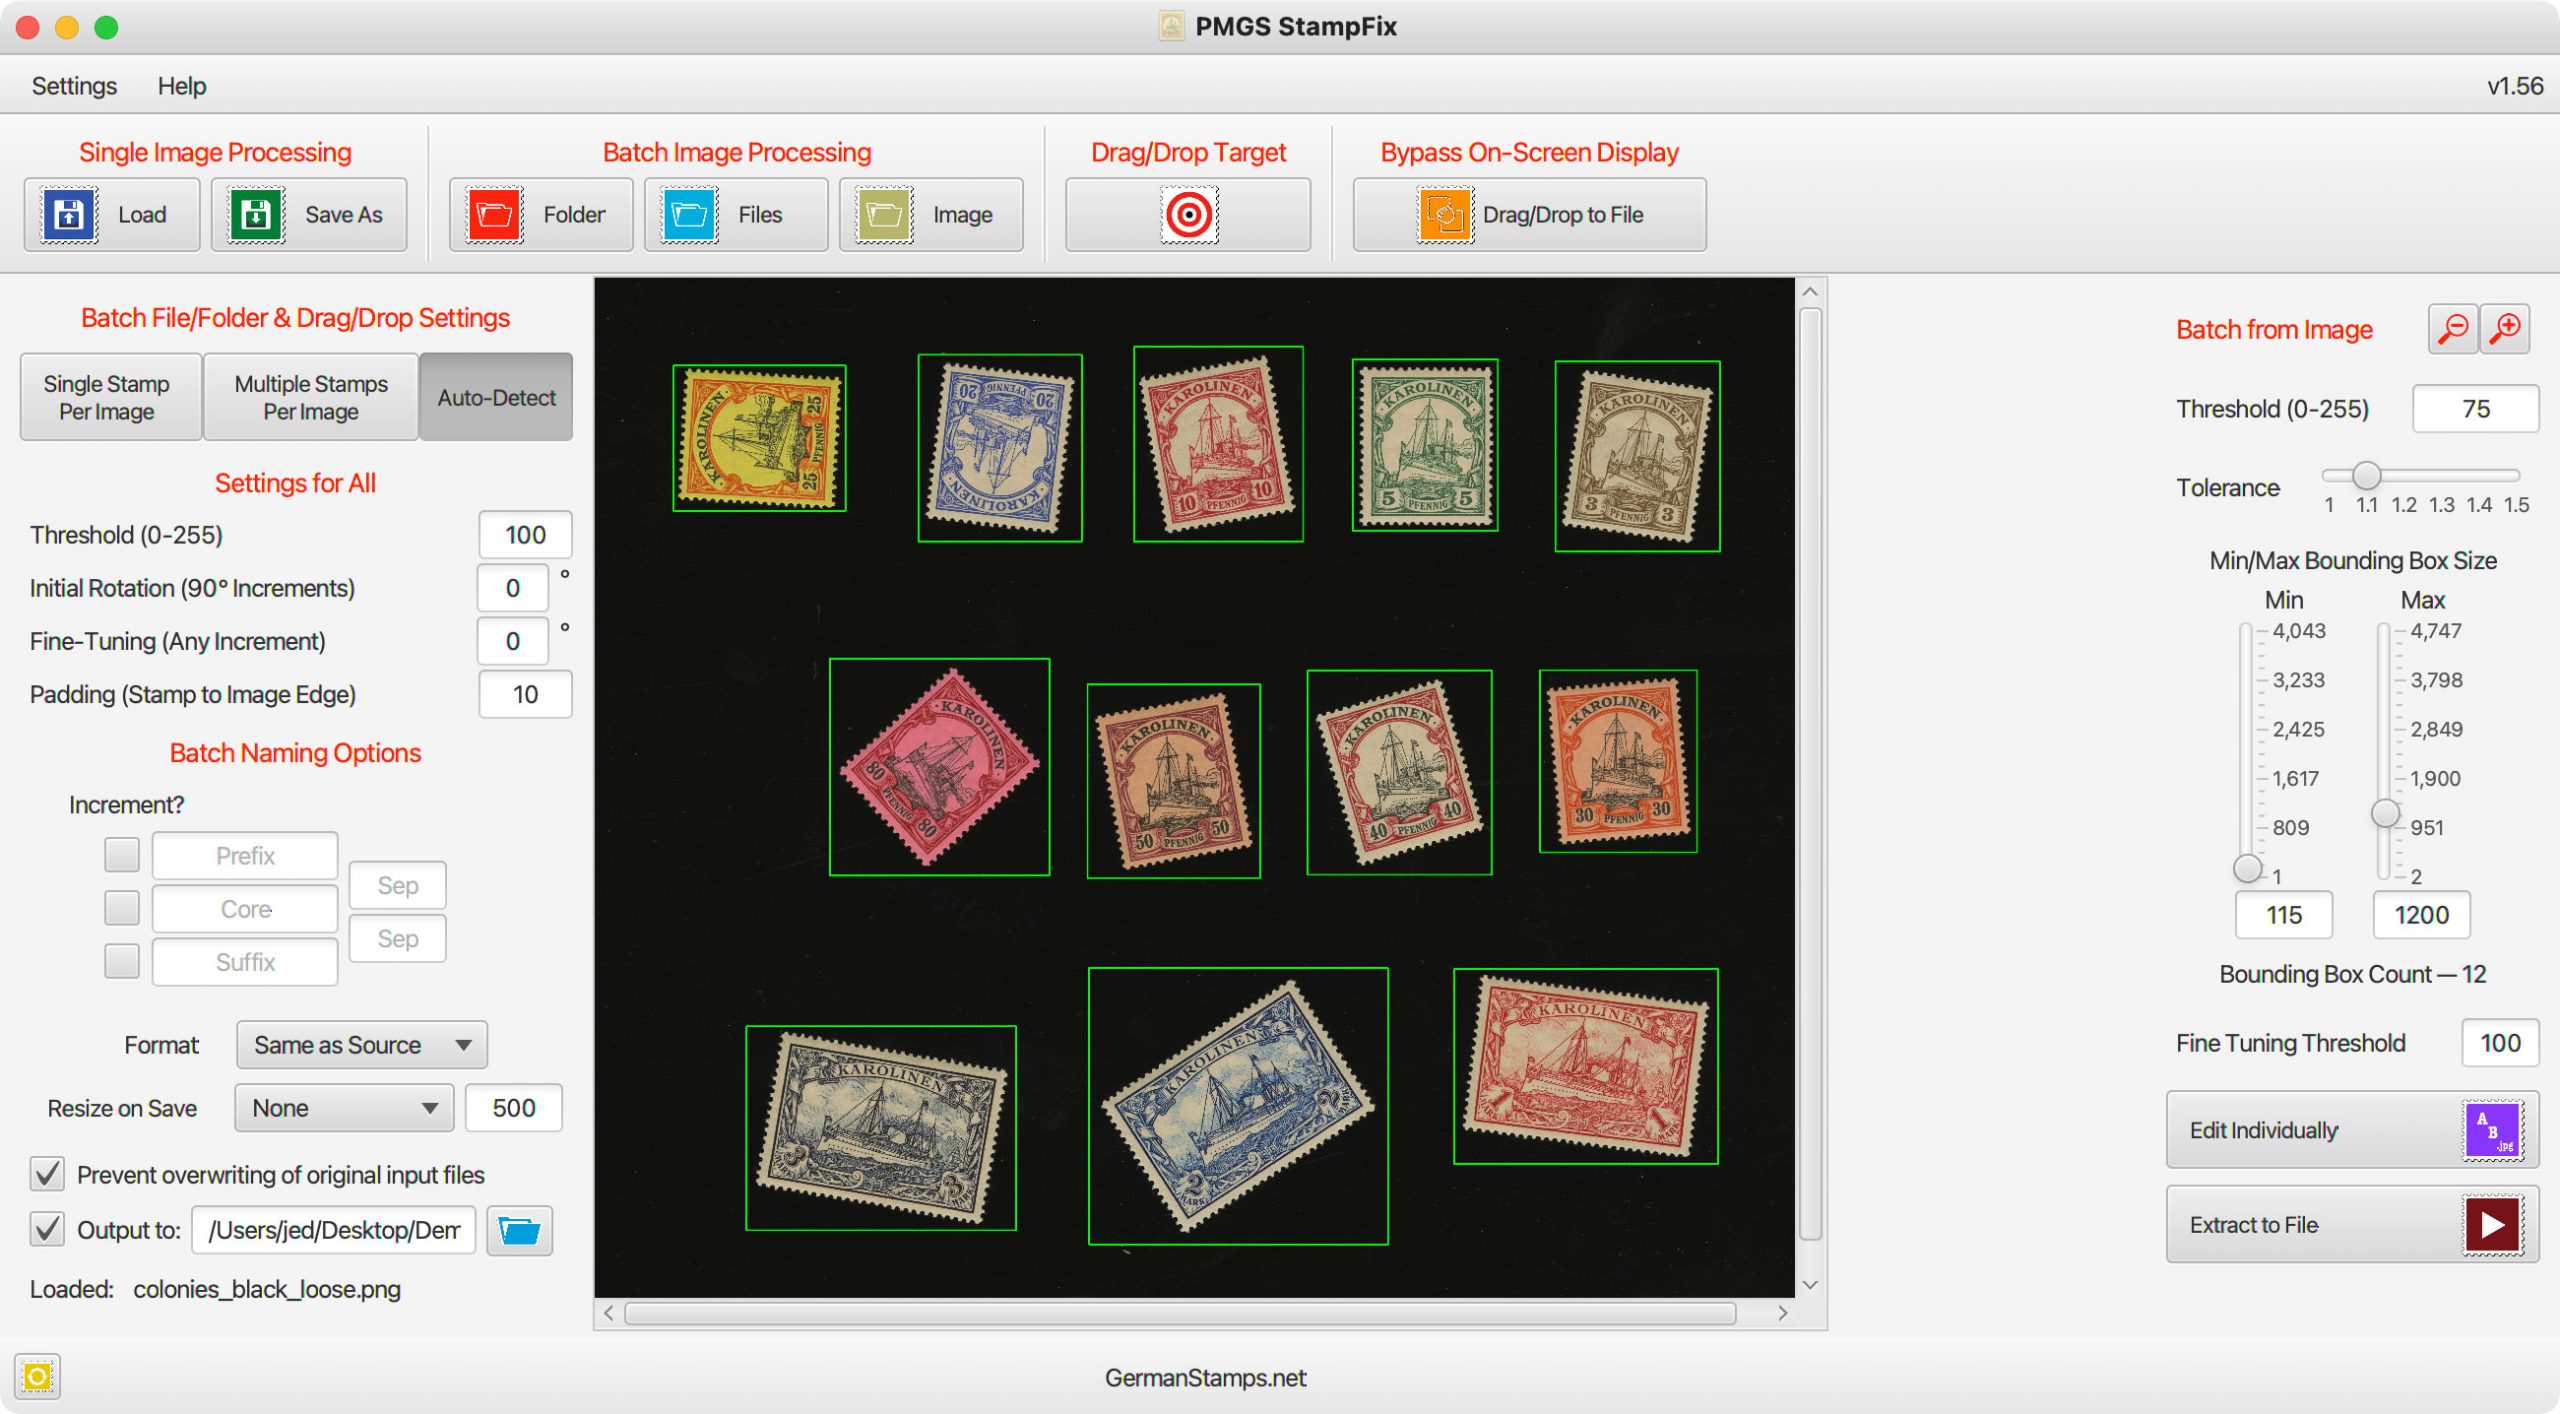
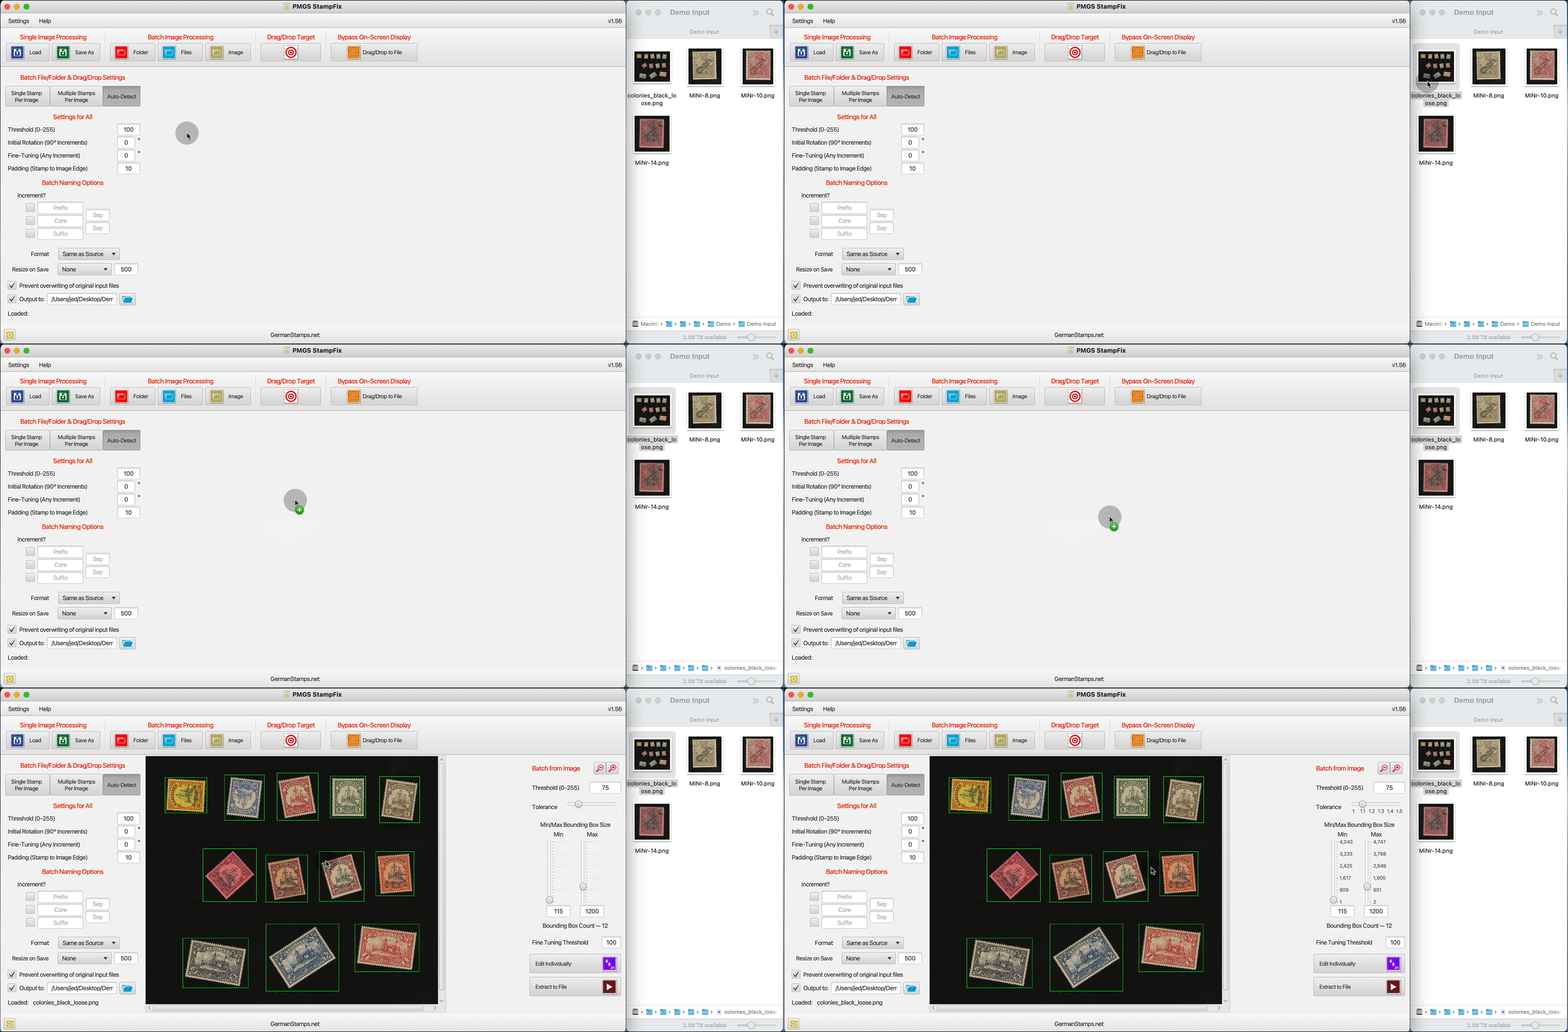
After you click the button and select a file, the app will open a second sidebar containing additional settings for the Batch from Image process.
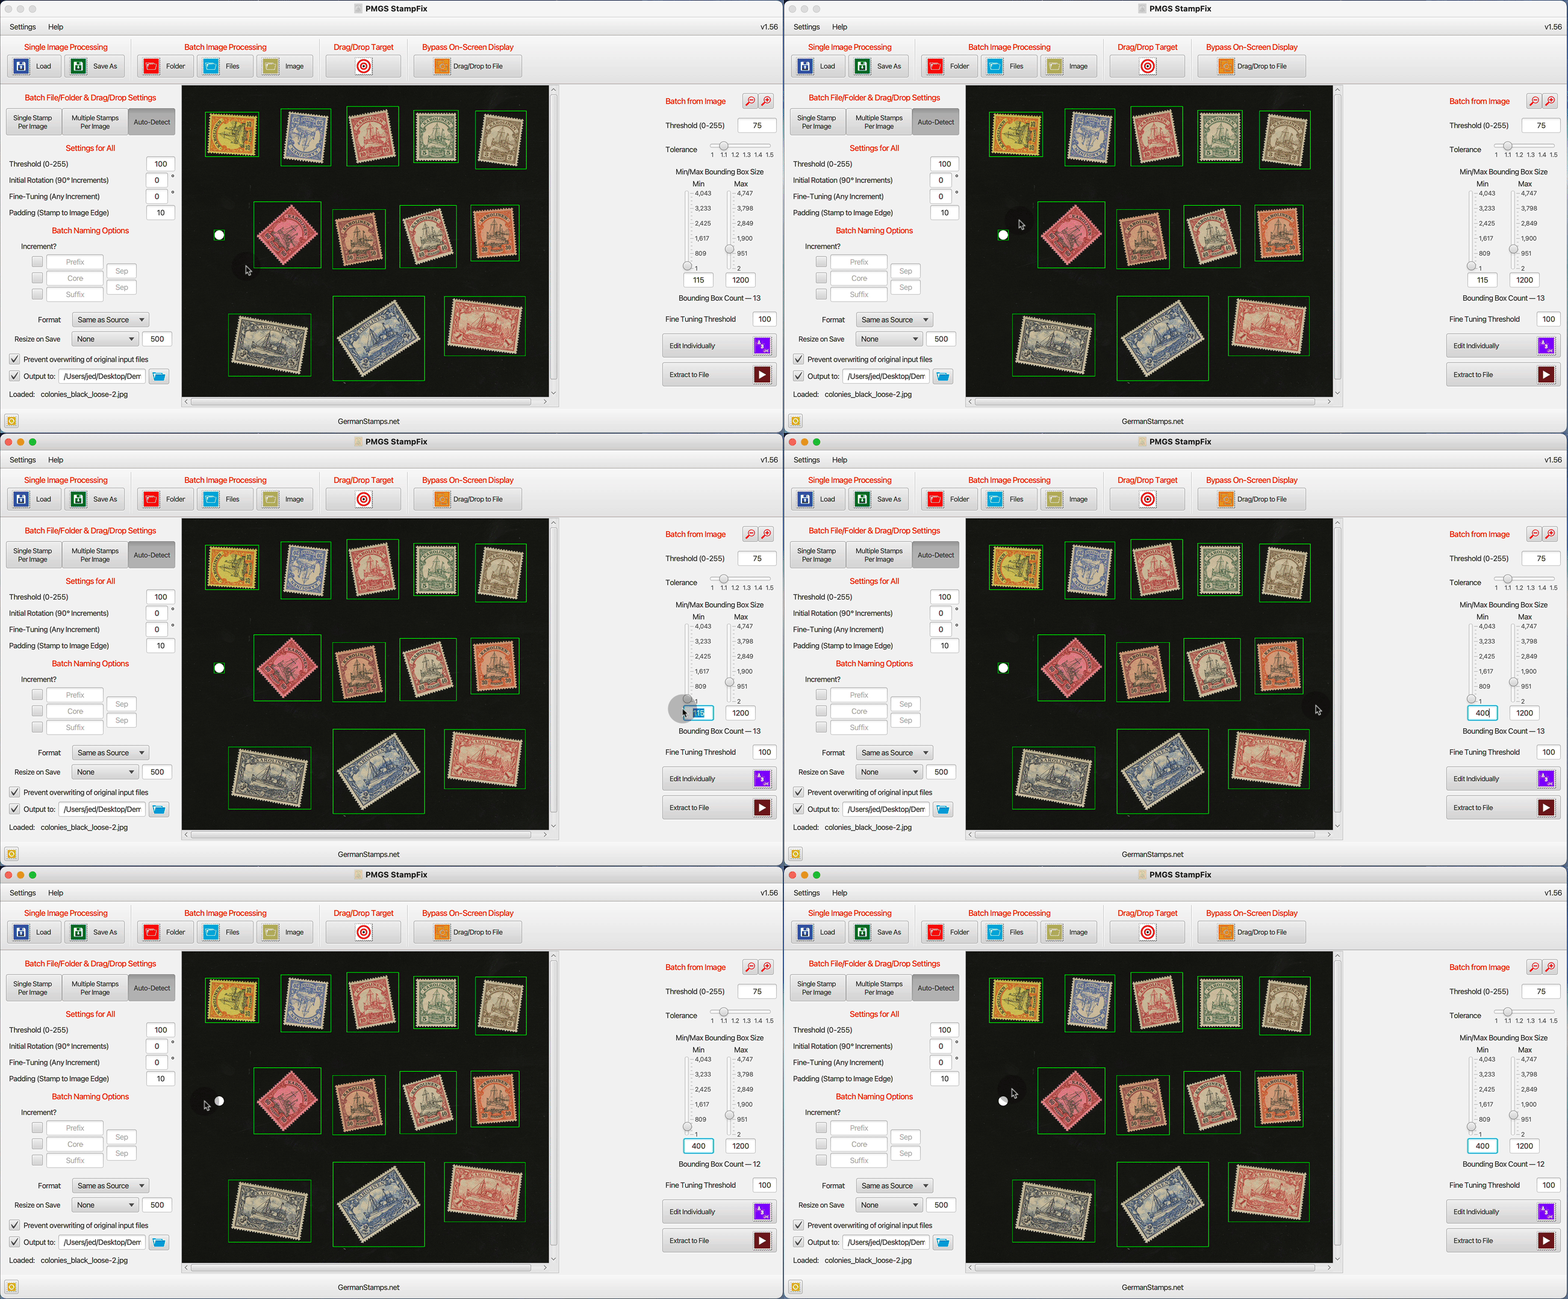
Green Boxes
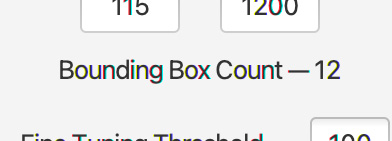
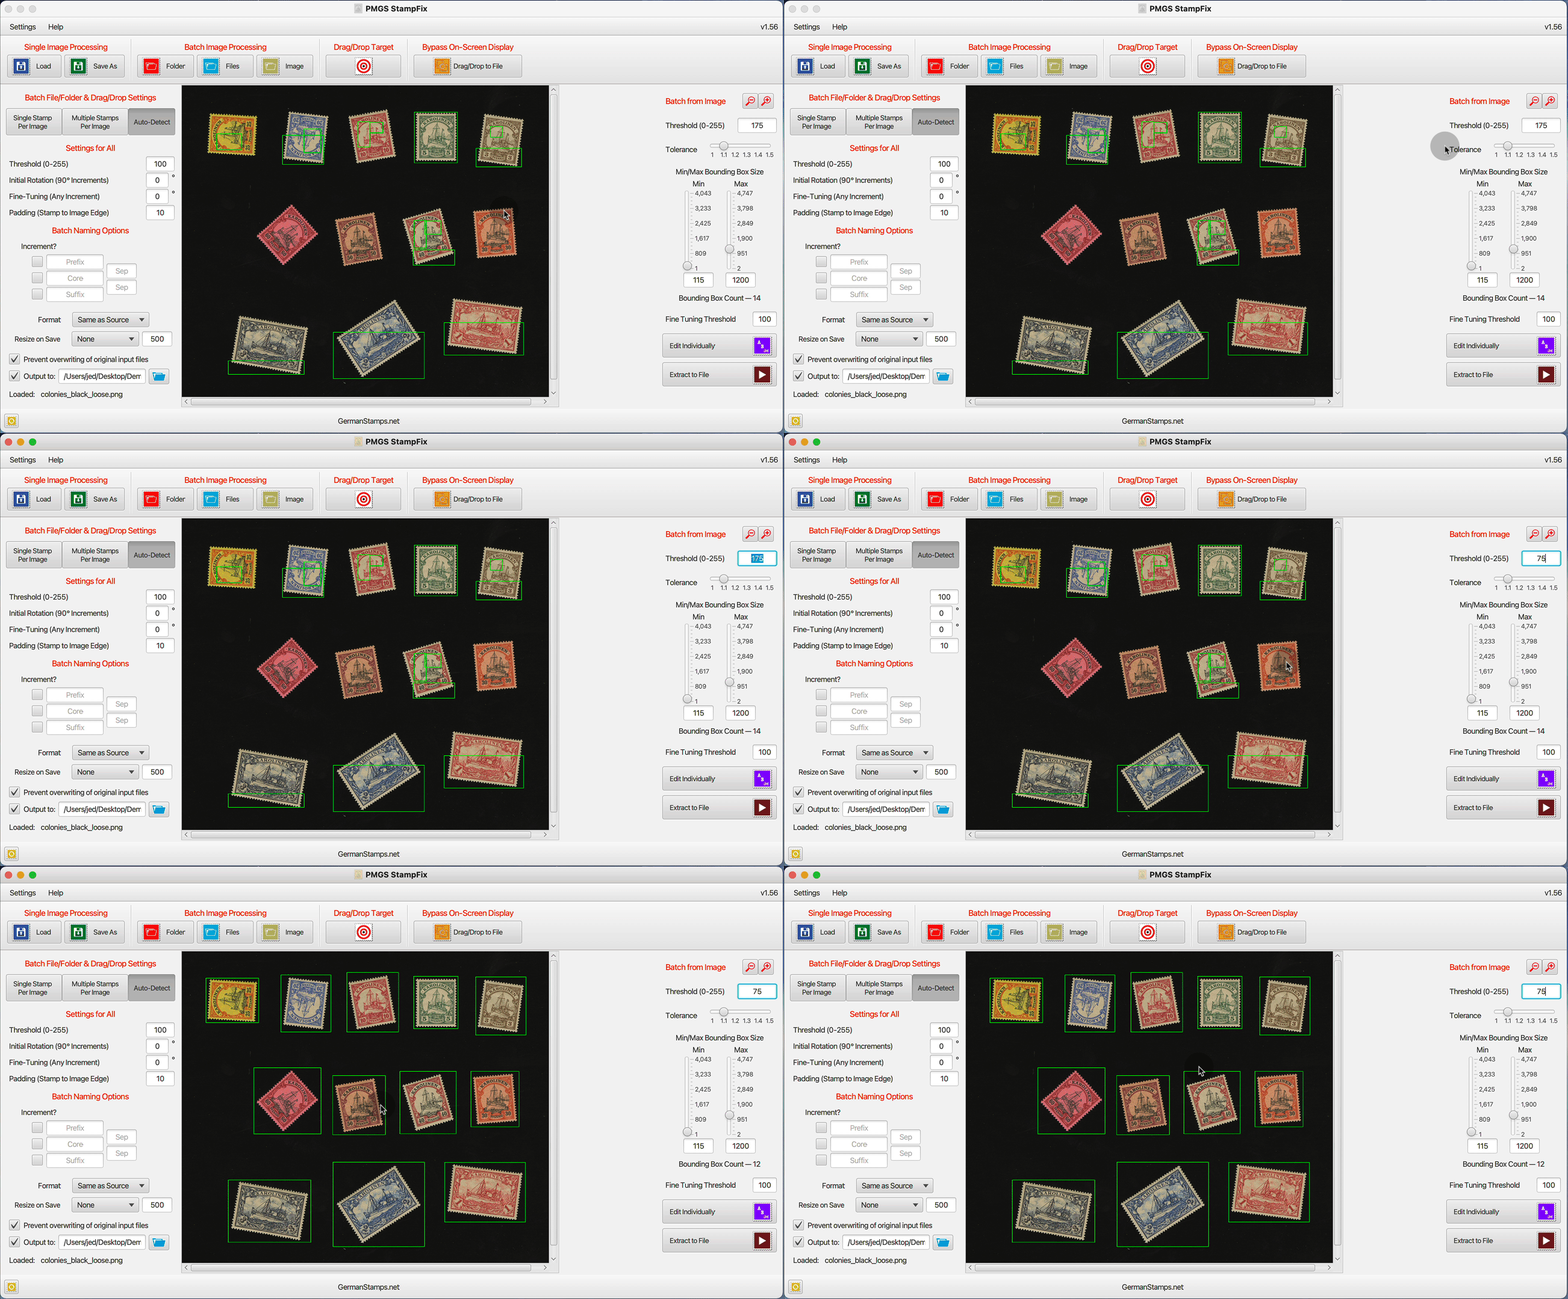
The app attempts to detect the stamps and draws a green box around each. The number of boxes drawn is shown in the right sidebar as Bounding Box Count.
For the app to produce accurate results as it extracts the stamps from the background, it is important that the Bounding Box Count match the number of stamps. The remaining Batch From Image settings in the right sidebar allow you to fine-tune the drawing of the boxes in order to achieve a matching number.
Batch From Image Settings
These settings fine-tune the drawing of the boxes in order to make the Bounding Box Count match the number of stamps in the image. The image will update after a change is made to any of the settings.
Threshold (0-255) — The Threshold setting is the most important setting in getting accurate results. This setting assists the app in finding the edges between the background color and the foreground images. The best Threshold value will vary based upon the color of the background and the color of the foreground image. If the difference in color between the background and foreground colors is large (for example, a stamp with white paper scanned on a black background), there can be a large window of “correct” settings (ex. any number from 75-125 might produce a correct bounding box count). However, if the difference in color between the background and the foreground image is smaller (ex. a stamp with dark-colored paper scanned on a black background), the window of “correct” settings might be very small (ex. only a setting of 75-80 might produce a correct bounding box count).
For black backgrounds, a “good” threshold setting will typically be in the 75-125 range, depending on the shade of black. For white backgrounds, it will typically be in the 200-225 range. Changing this value will force a recalculation of the bounding boxes using the new Threshold value.
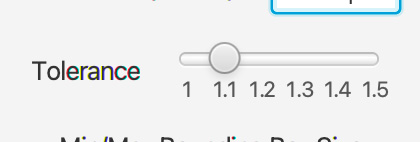
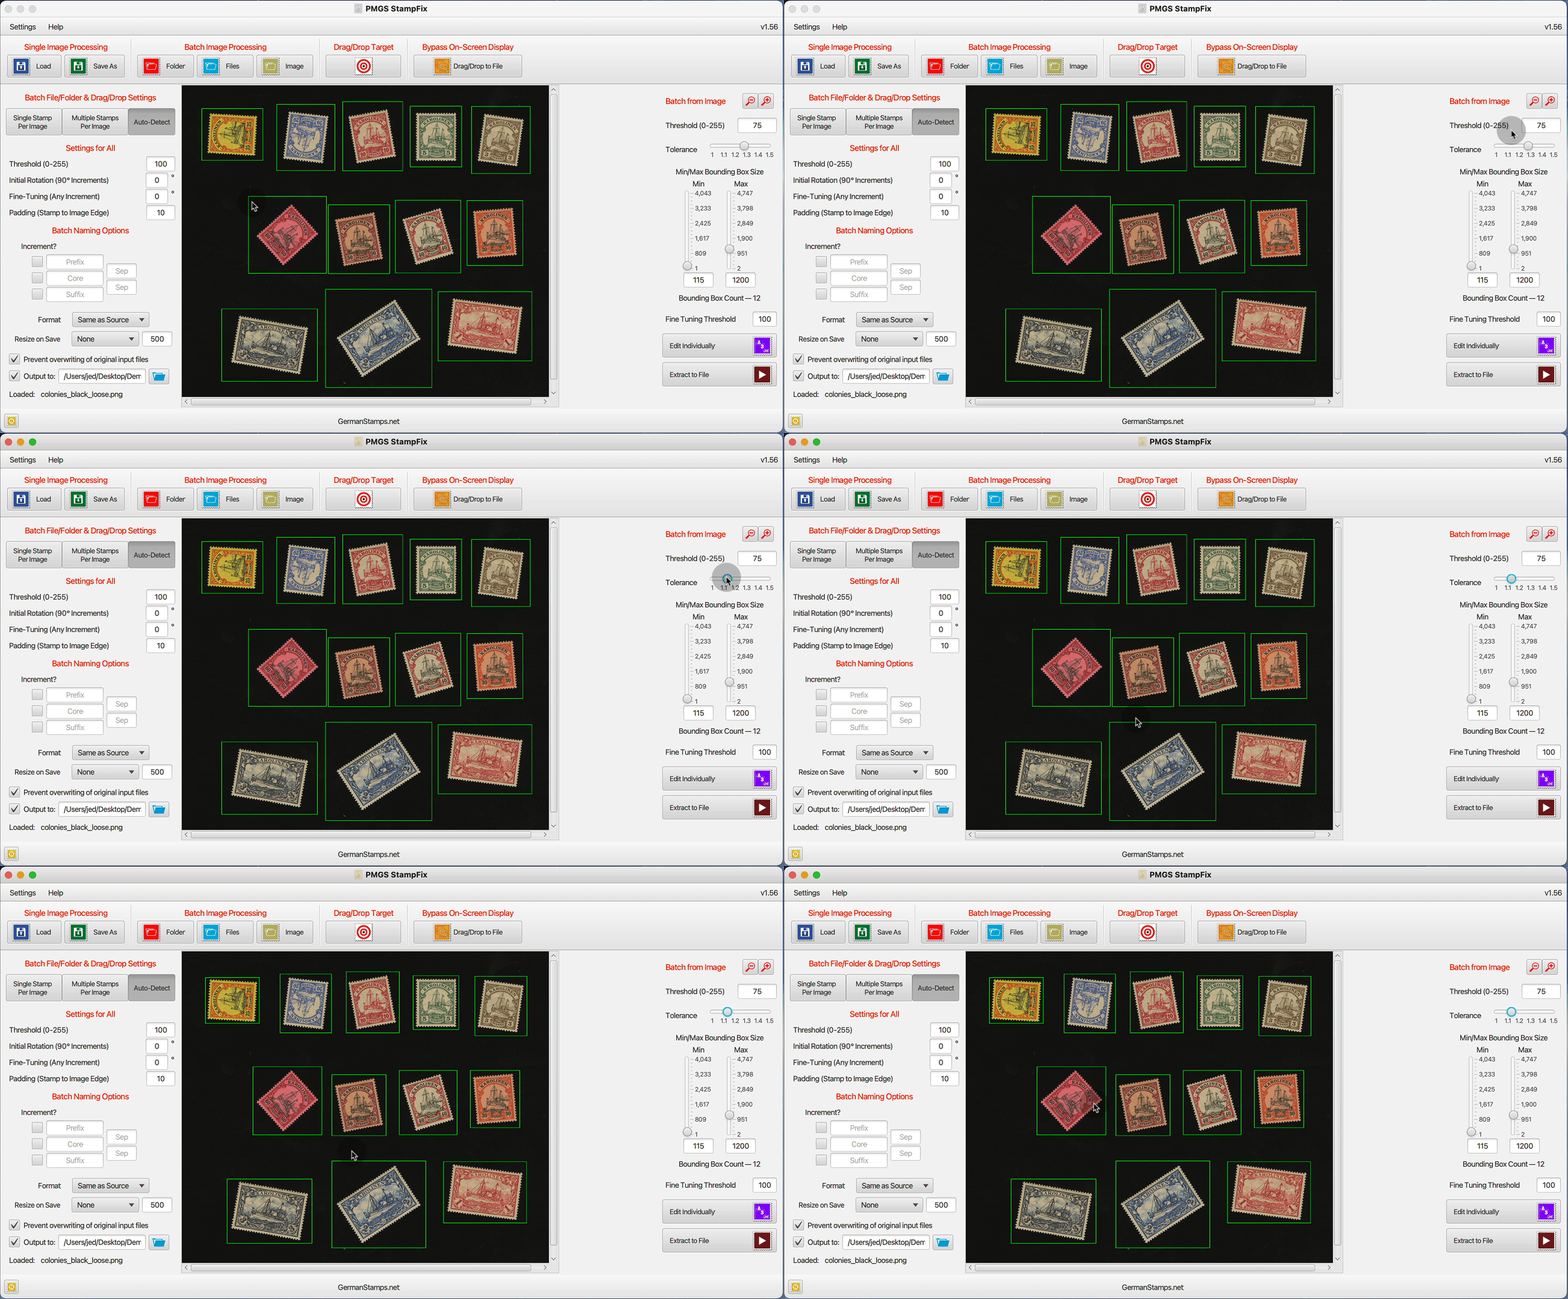
Tolerance — The Tolerance setting allows you to manually control how tight the green bounding box is drawn to the edges of the stamp. The area within the green bounding box is what is extracted from the larger image, then straightened and cropped. If the green bounding box for one stamp is large enough that it includes a portion of the neighboring stamp, the app will be unable to accurately straighten and crop the stamp If you find that the green bounding box is overlapping a neighboring stamp, reduce the Tolerance setting.
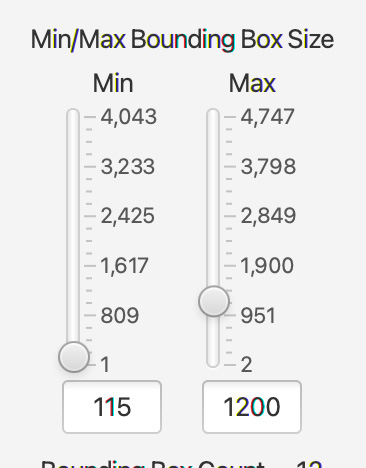
Min/Max Bounding Box Size — The app will sometimes draw excess bounding boxes after analyzing the image. This is typically due to stray light spots on the background (dust/debris on the scanner, scratches, etc.) or dark cancels in the middle of a light-colored stamp. These settings allow you to filter out excess bounding boxes by adjusting the minimum and maximum bounding box sizes. Any bounding boxes with a side smaller than the minimum or larger than the maximum, in pixels, will be removed from the on-screen image and not processed.
Fine Tuning Threshold — The best Threshold setting for drawing the bounding boxes is sometimes not the best setting for ensuring an accurate straighten and crop of the extracted stamps. The Fine Tuning Threshold setting allows you to specify a threshold setting for the stamp processing, Fine Tuning Threshold, that is different from the threshold setting used in drawing the bounding boxes, Threshold (0-255). If the stamps are being extracted from the larger scan correctly, but aren’t quite straightened or cropped correctly, try adjusting this setting to one slightly different from the Threshold setting.
Extract to File — Pressing this button will extract all images within the bounding boxes, process them using the Fine Tuning Threshold and the other stamp processing settings in the left sidebar (see desciption of these settings here), and save them to file using the save settings from the left sidebar (see desciption of these settings here).
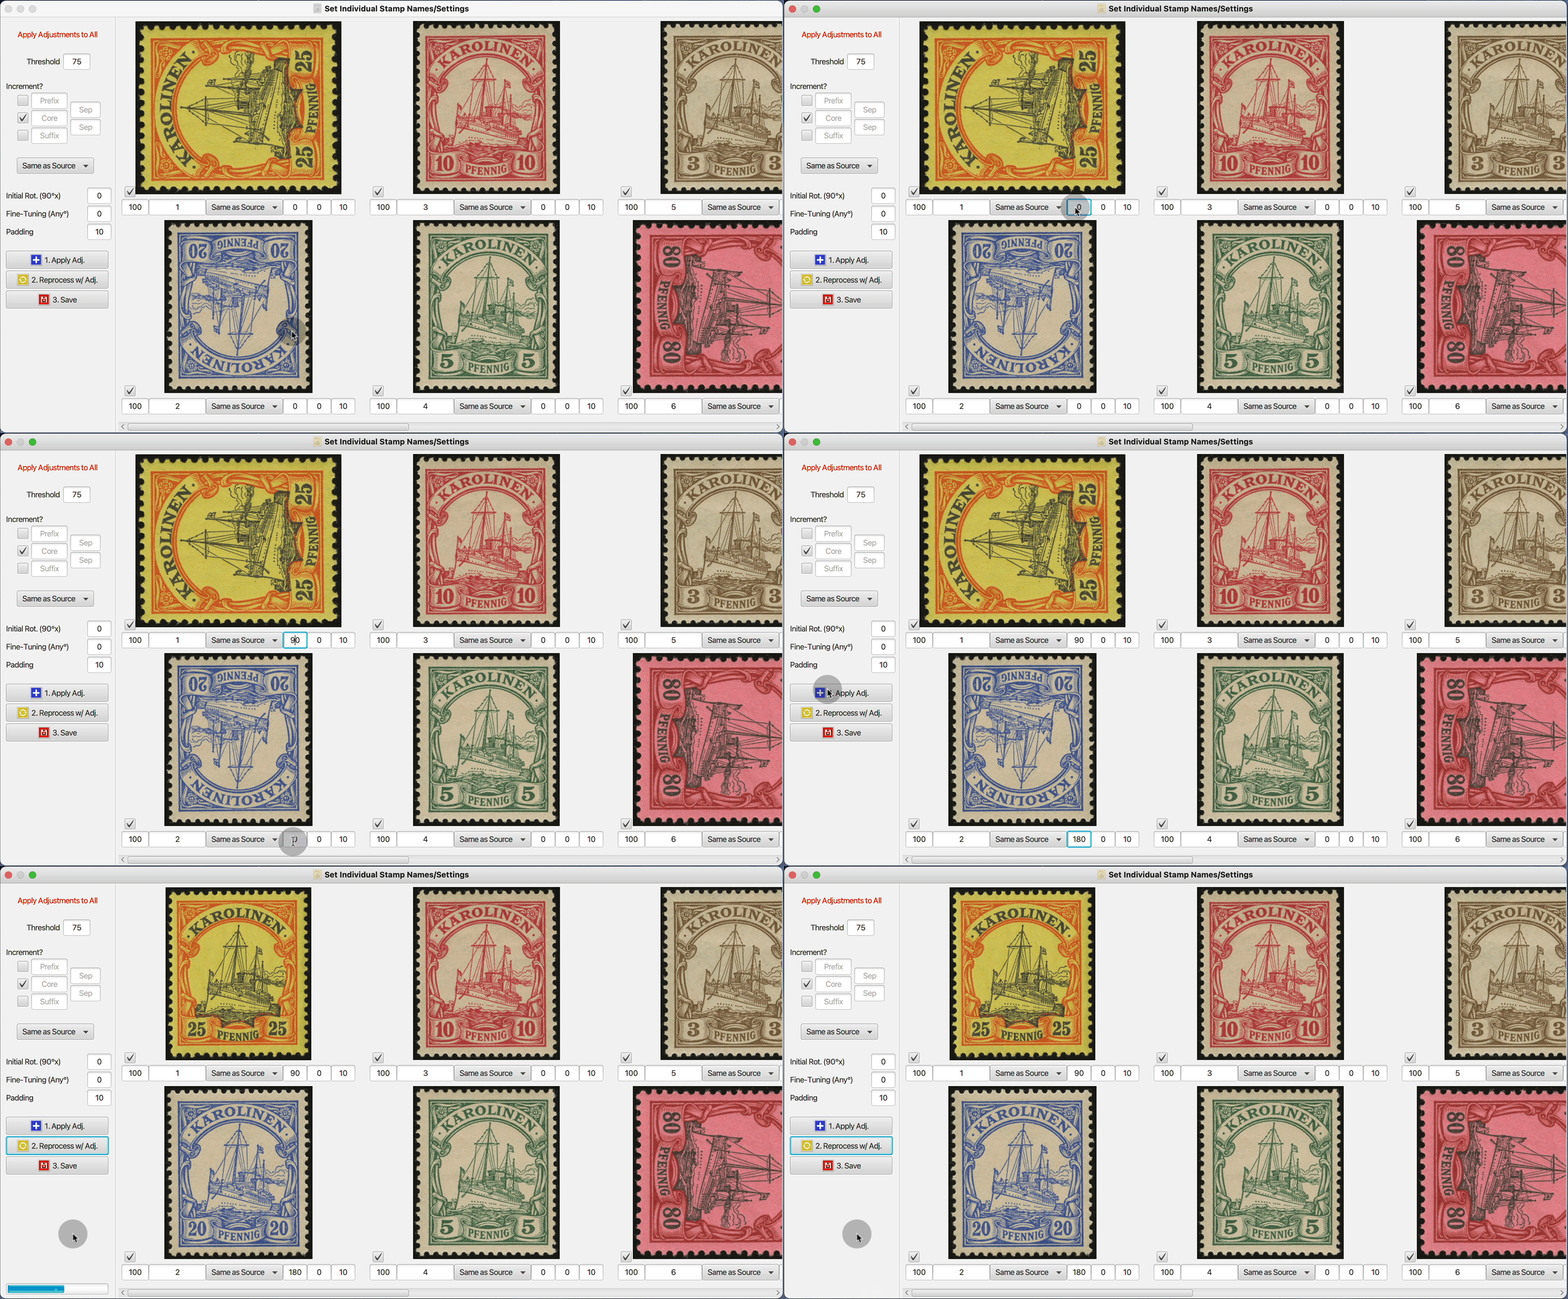
Edit Individually — This function allows you to view the individual images extracted from the larger image before they are written to file, allowing you to apply custom adjustments to each.
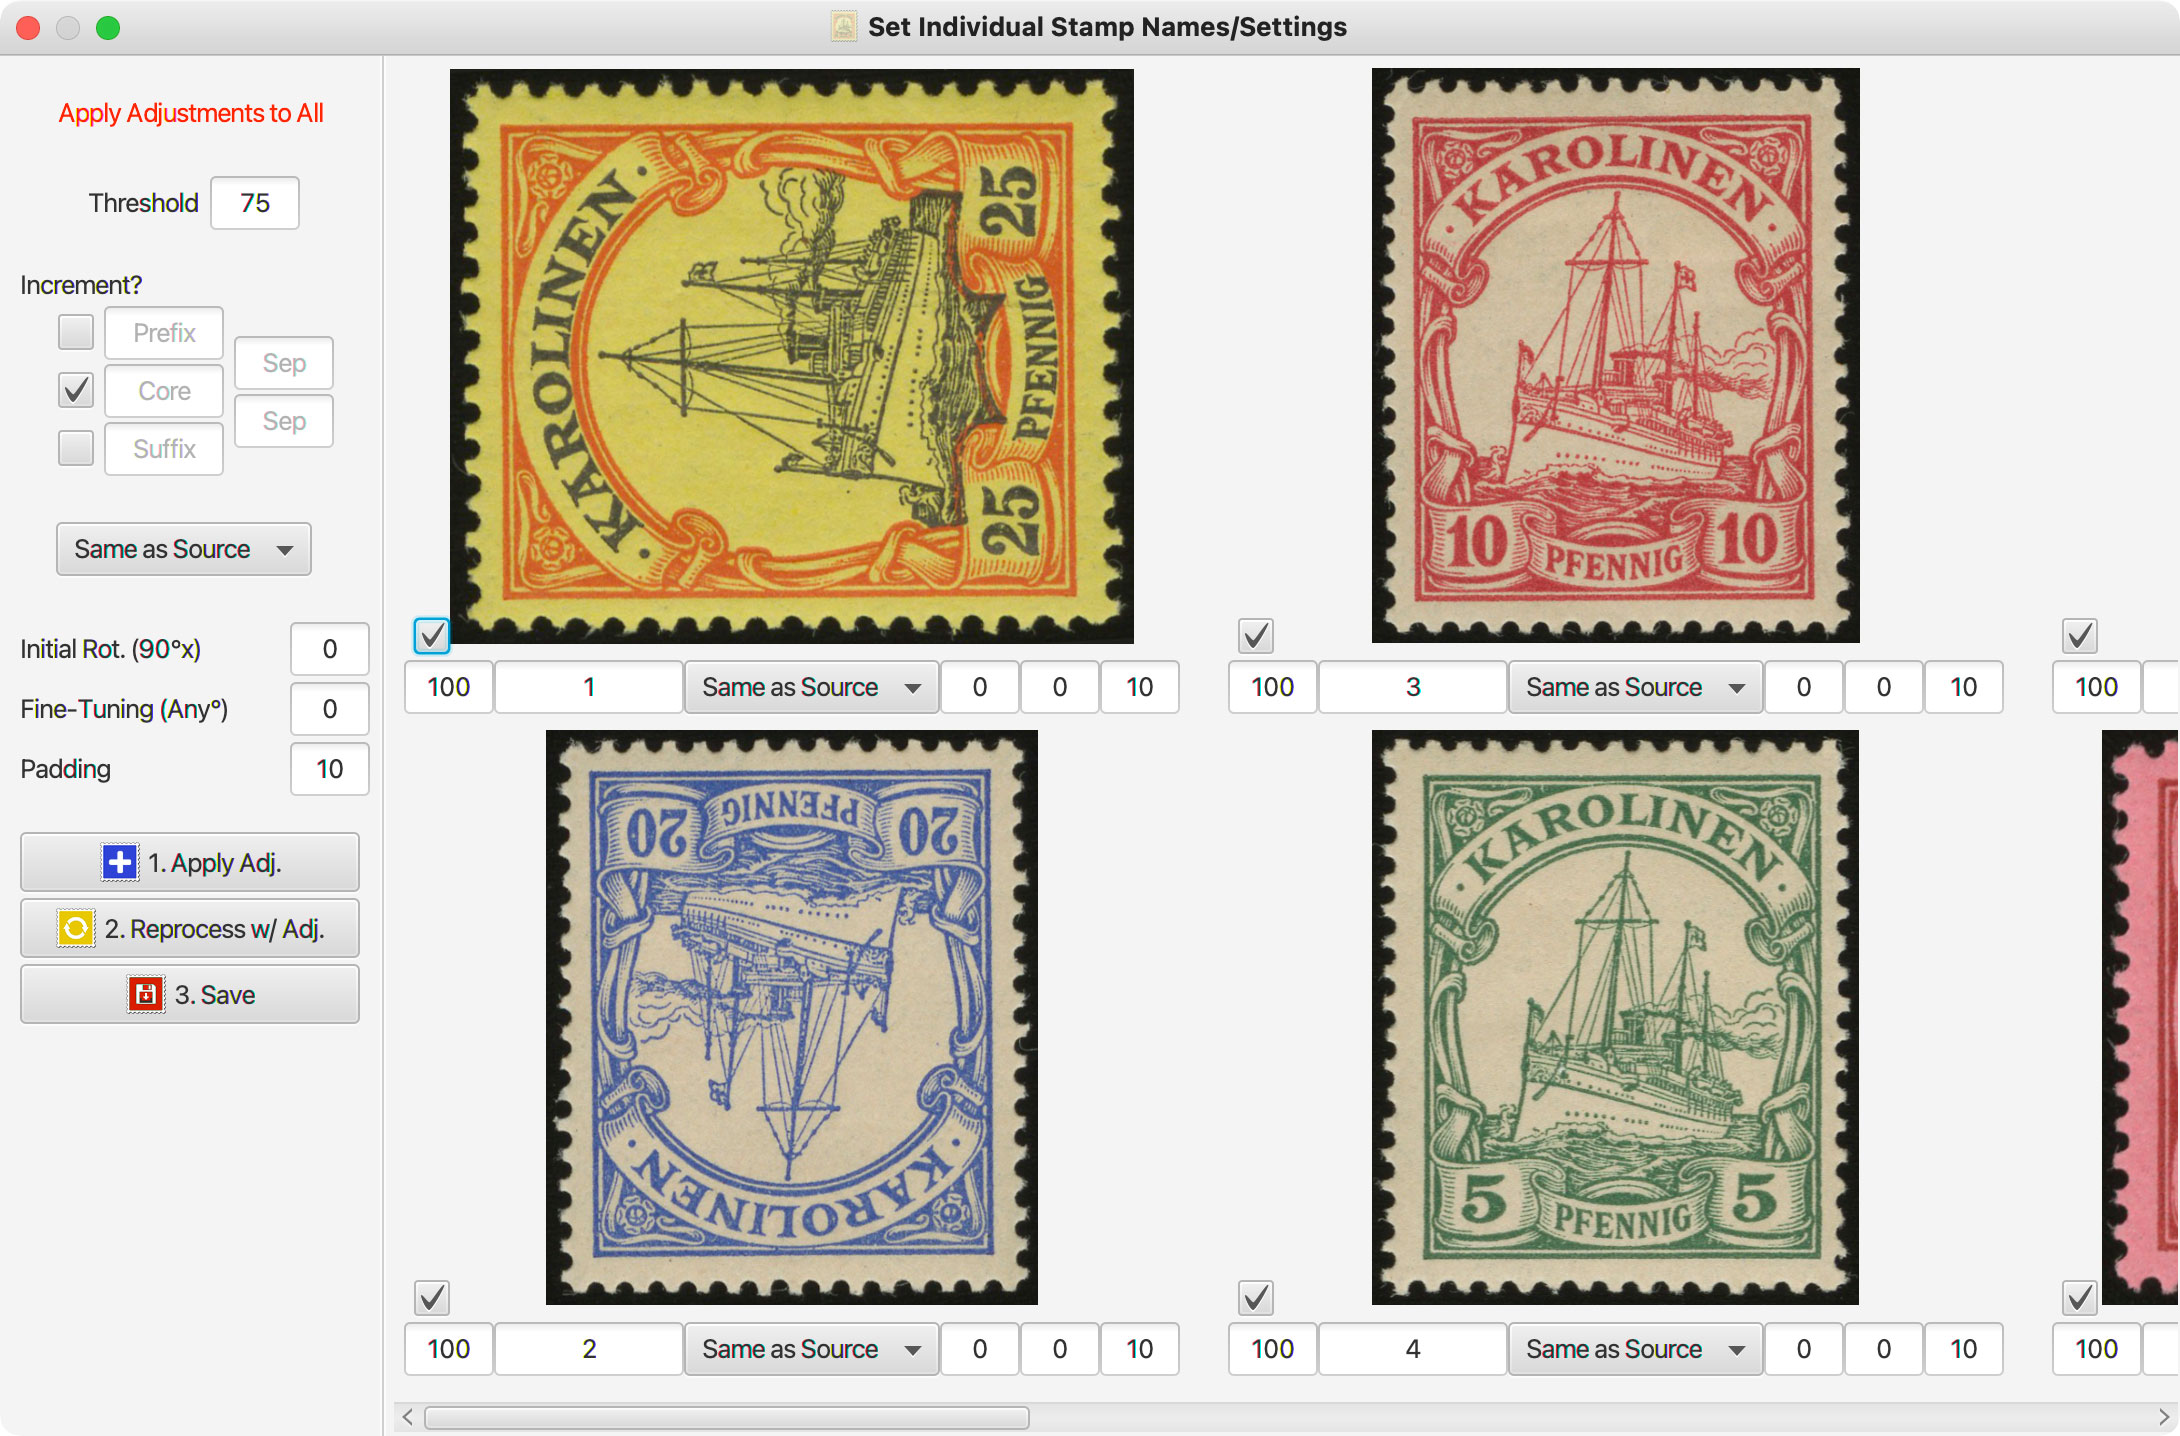
Pressing this button will load a new screen:
This window shows each image extracted from the larger image, with the stamp processing settings applied.
Individual Adjustments — Below each image is a row of boxes that allow you to apply individual adjustments to each image.
The boxes are, from left to right:
- [Checkbox] Include this Image in Output
- Threshold
- Filename
- File extension
- Initial Rotation (90° Increments)
- Fine-Tuning Rotation (Any Increment)
- Padding
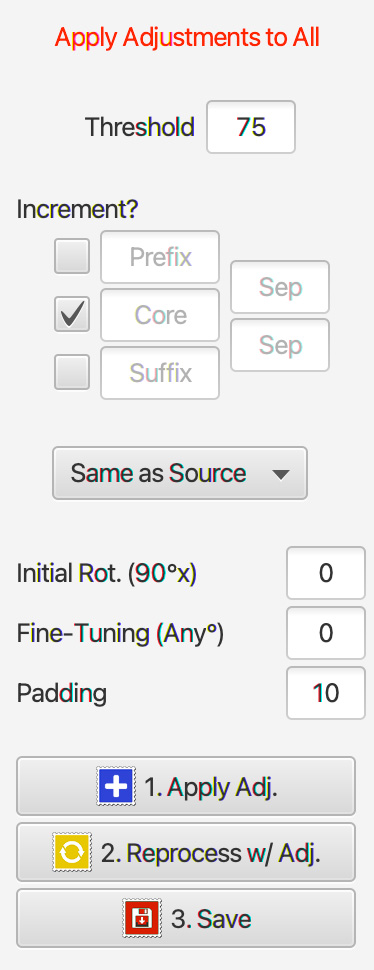
Global Adjustments — At the left of the window is a series of boxes that allows you to apply new settings globally across all the images
If you apply a global setting across all images, it will overwrite ALL individual settings on the images. You should therefore apply any global settings first, then add any individual adjustments to the individual images.
Reprocess — Once you have input any desired adjustments to the images, click the Reprocess button to reprocess all the images with the new settings.
Save — Once all images are adjusted as desired, click the Save button to save all checked images to file.
Drag/Drop
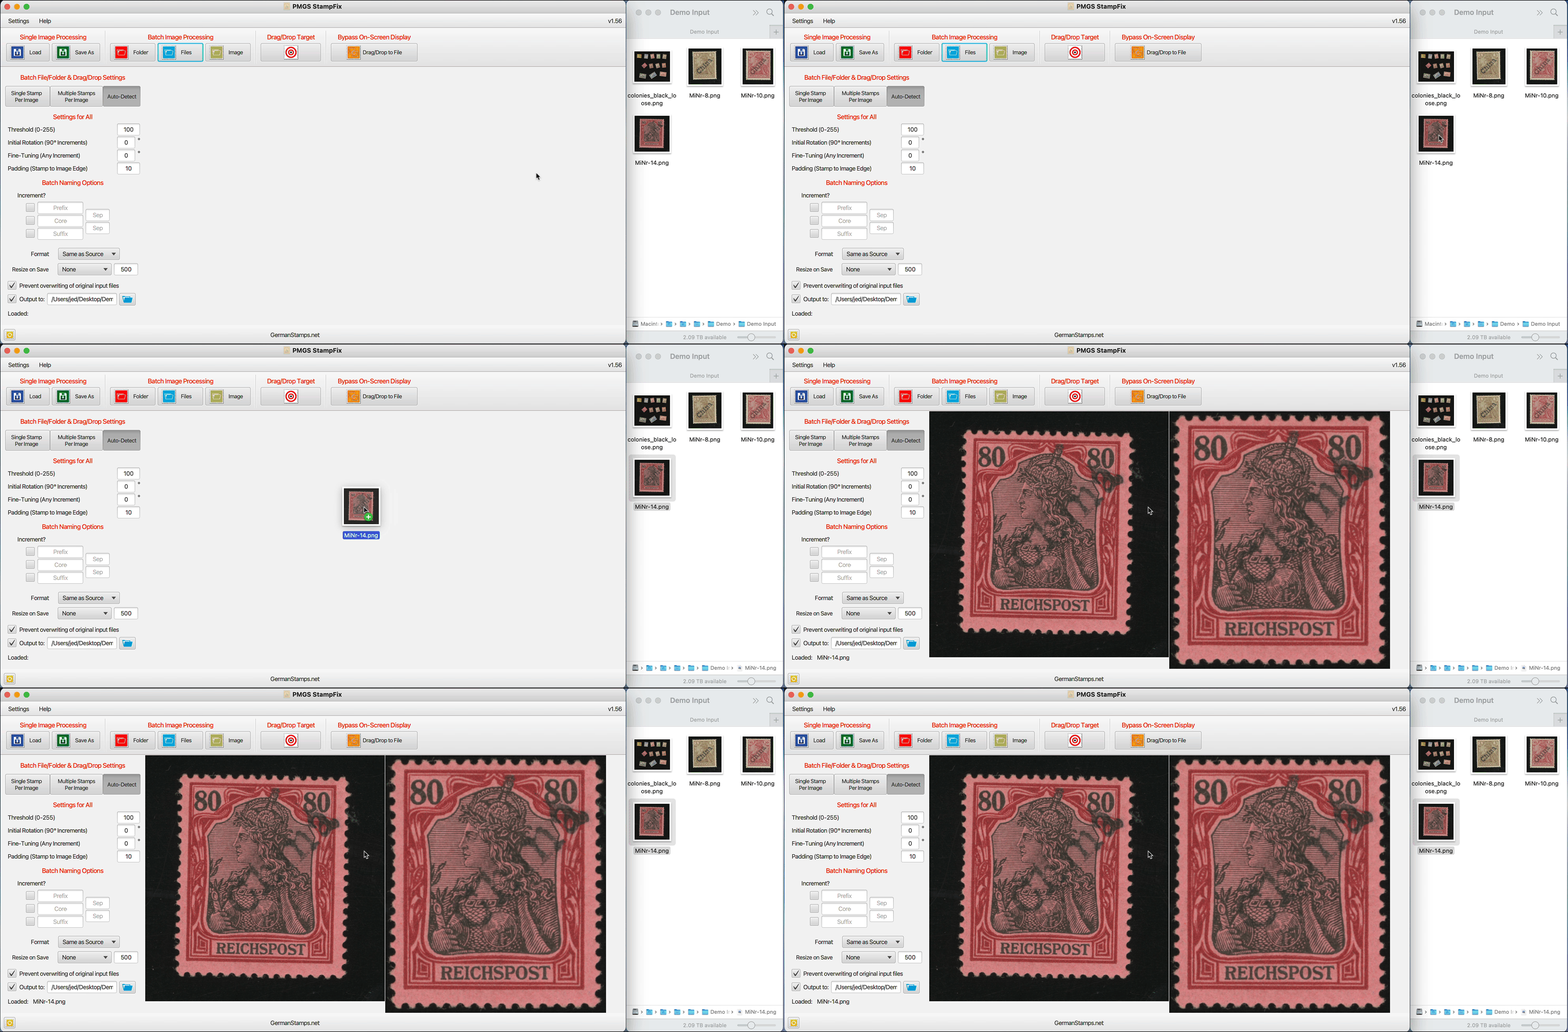
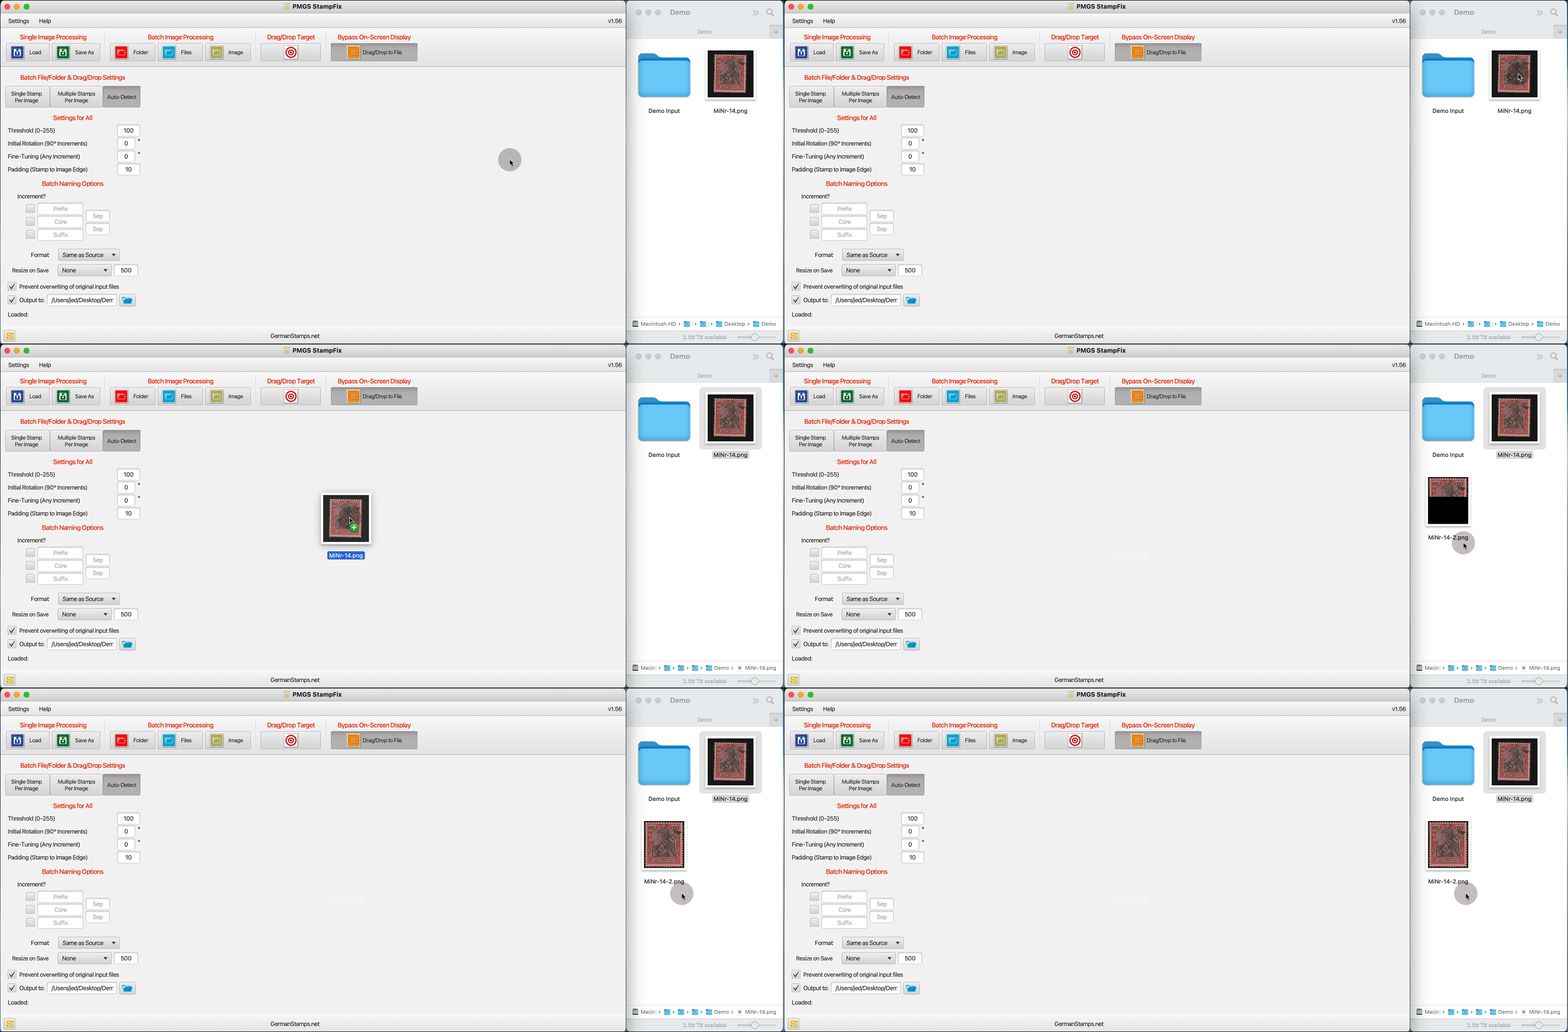
This function allows you to drag and drop files/folders for processing. They can be dropped anywhere in the large open area of the app, even if there is already an image displayed in that area.
If a single file is dropped — either an image containing a single stamp or an image containing multiple stamps — the app can either open and display the processed image in the app or process the file and save the results directly to file. This open or save option is controlled by the Drag/Drop Directly to Save toggle, discussed here.
If multiple files or a folder are dropped in the target area, the app will use the stamp processing settings to process all dragged/dropped images (see desciption of these settings here), then save the results directly to file using the save settings (see desciption of these settings here).
This function can be used to process both images containing a single stamp, and those in which there are multiple stamps, extracting each stamp as its own image, all in a single step. However, if the selection of files dropped contains a mixture of the two types, it’s critical that the Auto-Detect button is selected (see description of this setting here).
Drag/Drop Target
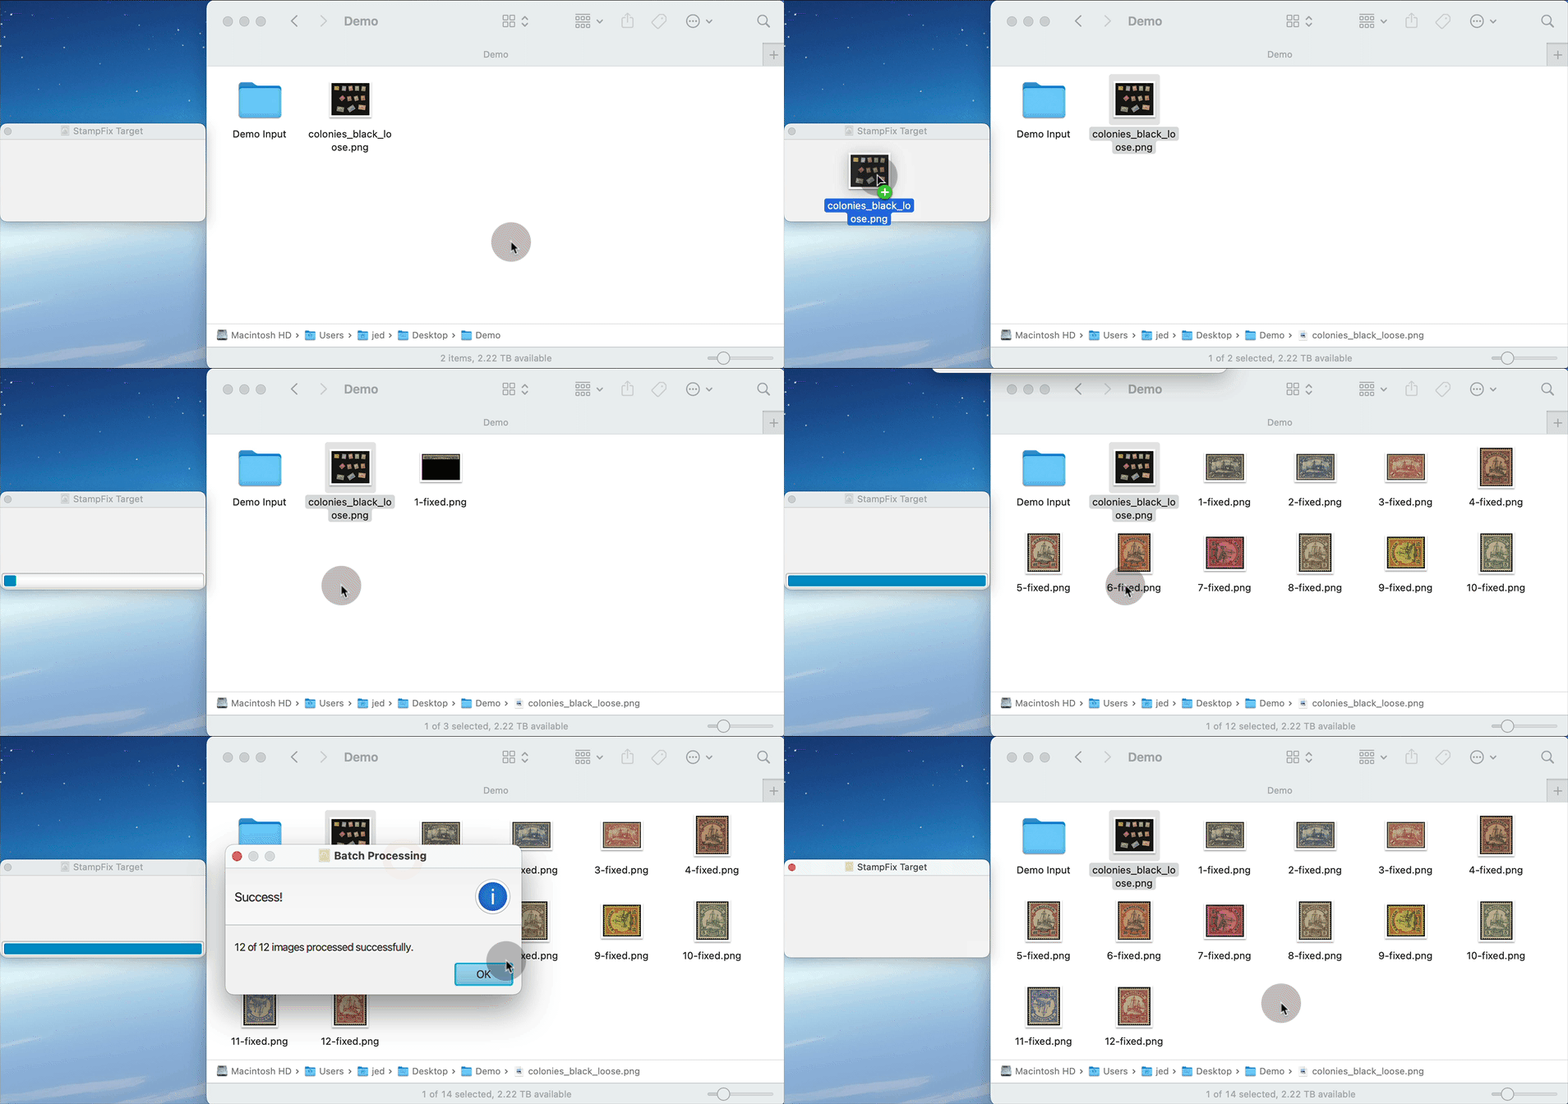
This function opens a small target window to which you can drag and drop files/folders for processing.
The app will then use the stamp processing settings to process all dragged/dropped images (see desciption of these settings here). The results are not displayed in the app, but rather saved directly to file.
This function can be used to process both images containing a single stamp, and those in which there are multiple stamps, extracting each stamp as its own image, all in a single step. However, if the folder contains a mixture of the two types, it’s critical that the Auto-Detect button is selected (see description of this setting here).
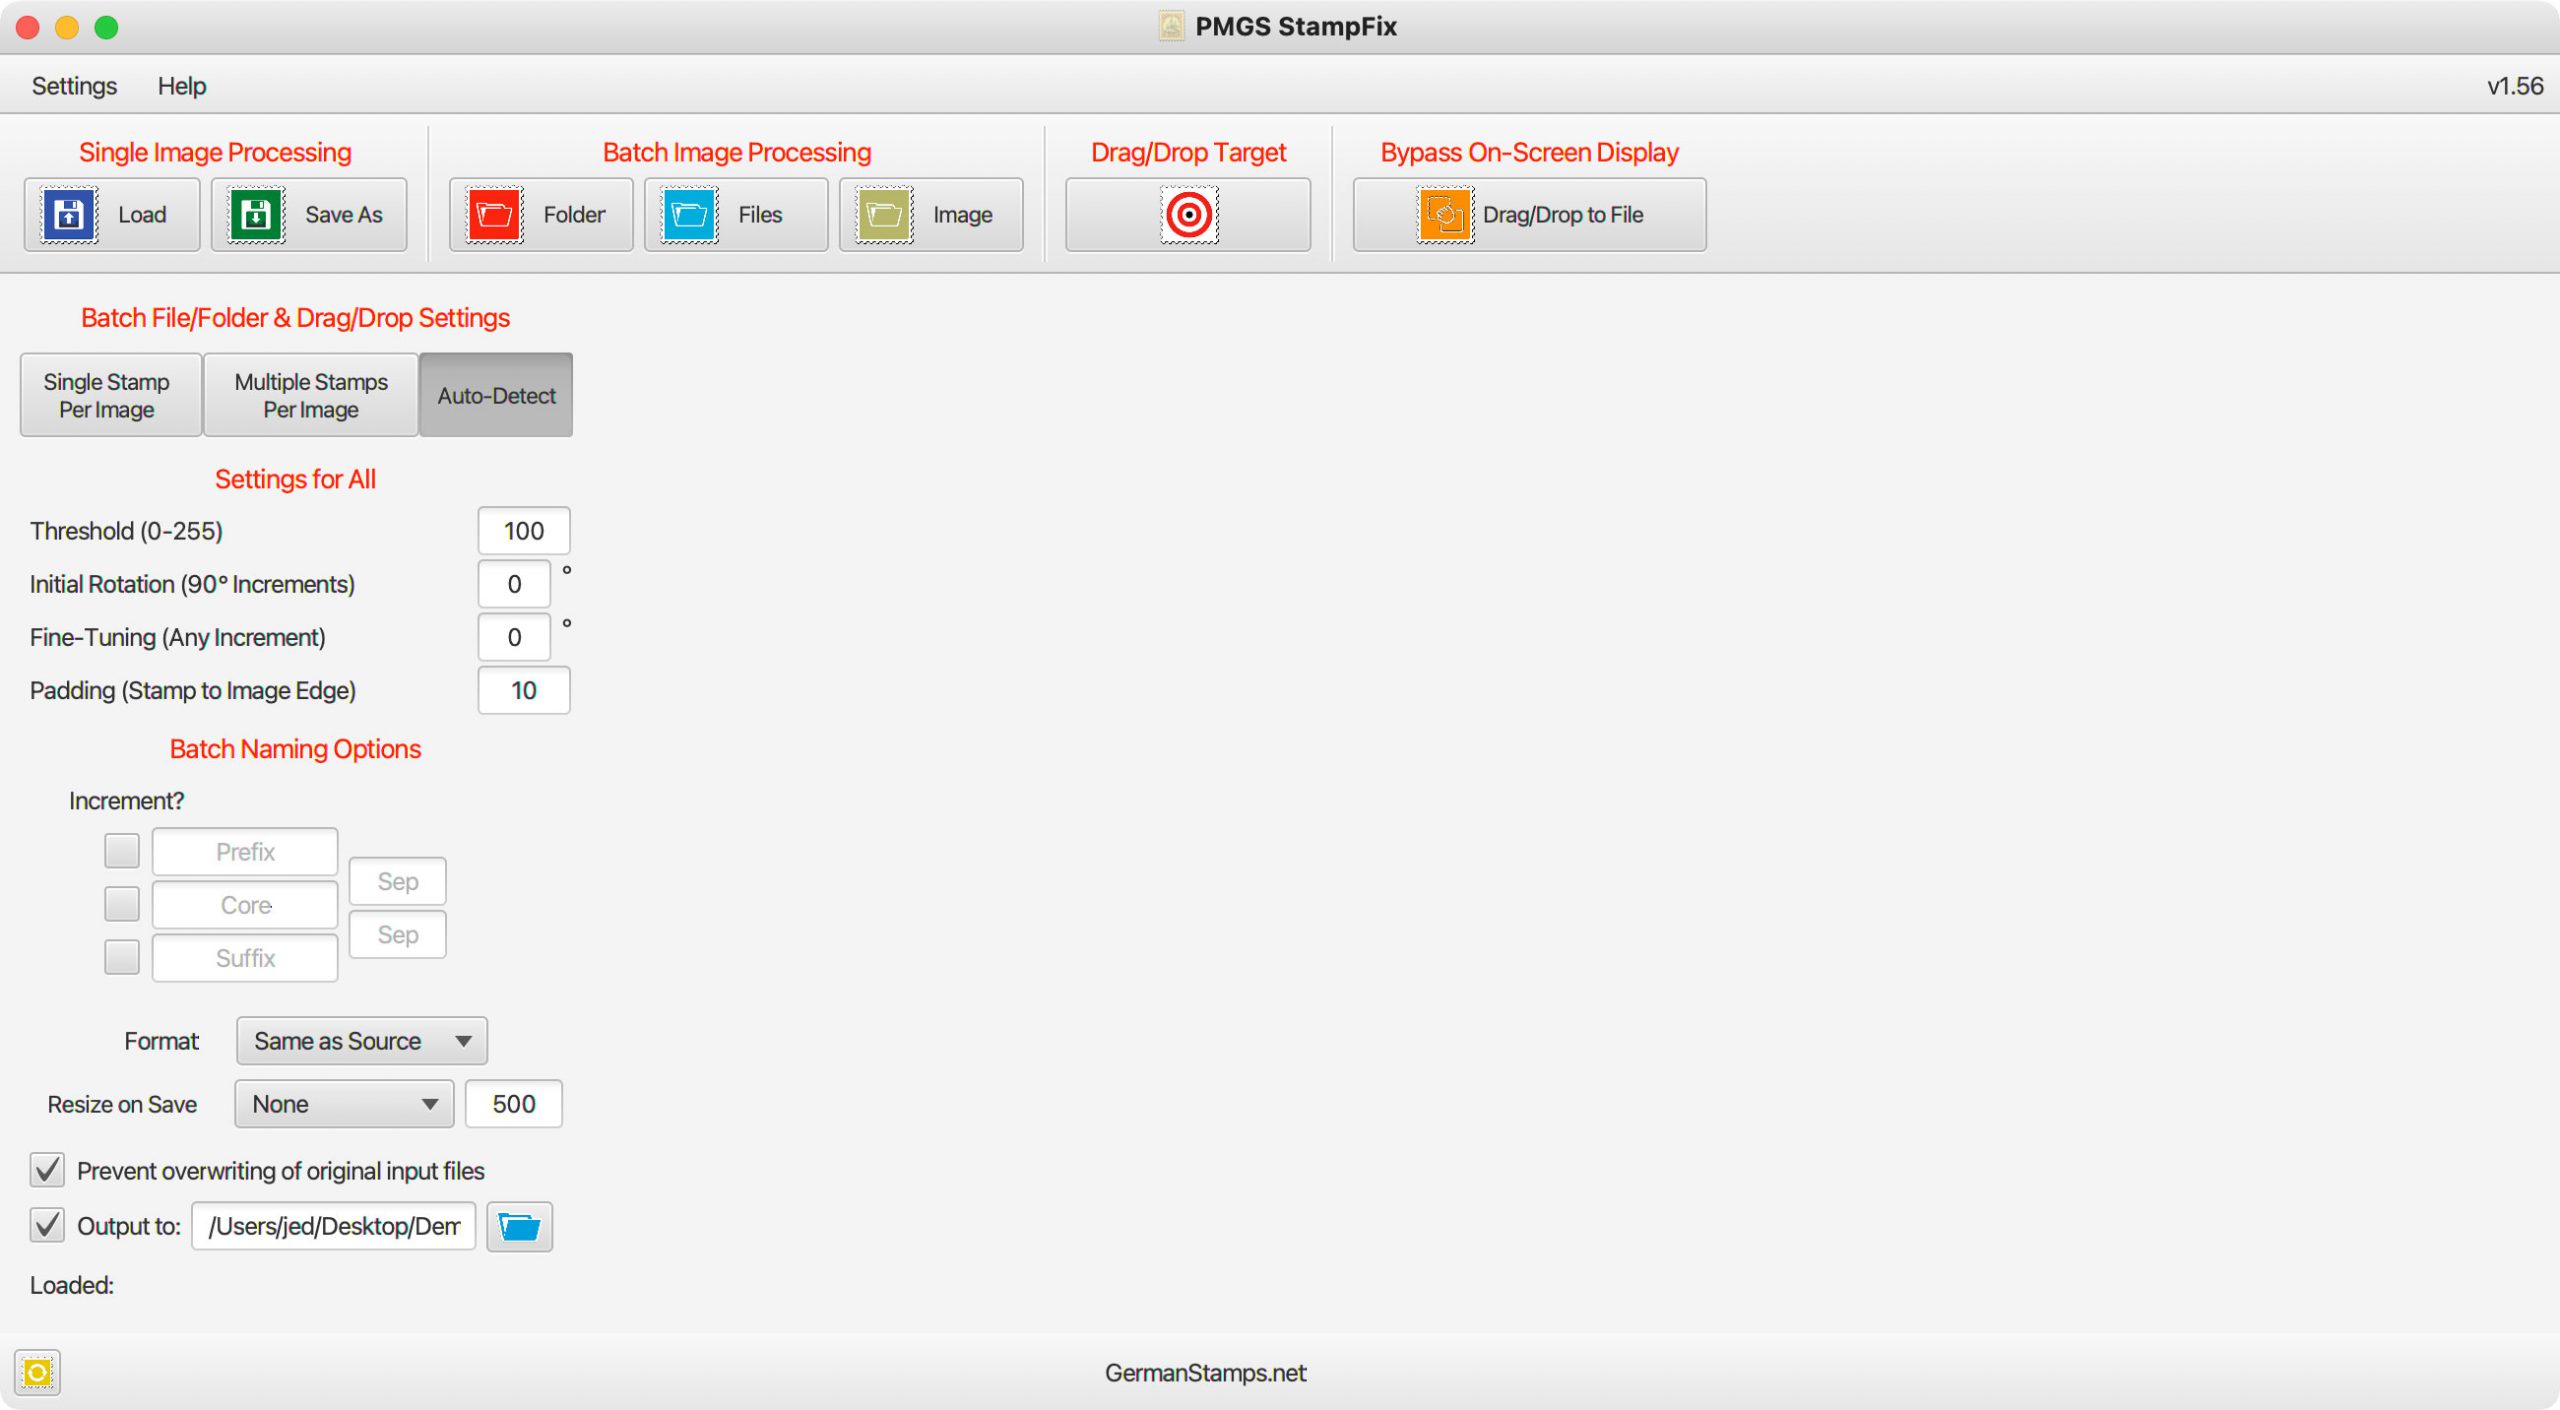
Batch File/Folder & Drag/Drop Settings
When batch processing multiple files or dragging and dropping files into the app (either single files or multiple), the app attempts to determine whether each file is of a single stamp or multiple stamps. This is because the process for extracting multiple stamps from an image is different from that used to process a single stamp.
On occasion, the app has difficulty auto-detecting whether the image contains a single stamp or multiple. This is more common with images of covers or postcards because the large light-colored space of a cover or postcard can appear to the app to be a white scanner background upon which a stamp is resting.
This toggle allows you to turn off the auto-detection and force the app to process images as images of a single stamp or images containing multiple stamps.
However, if you are using one of the batch functions or the drag and drop to process a group of files of mixed type (some images of single stamps, some containing multiple stamps), it’s critical that the Auto-Detect button is selected. Otherwise, you will get inconsistent results.
Drag/Drop Directly to Save
When dragging and dropping single image files, either of a single stamp or of multiple stamps, the default behavior is for the app to open the file, process it, and display the result on screen in the app.
This toggle, if selected, changes this behavior so that the app opens the file, processes the image, and saves the result directly to file, without displaying it on-screen in the app.
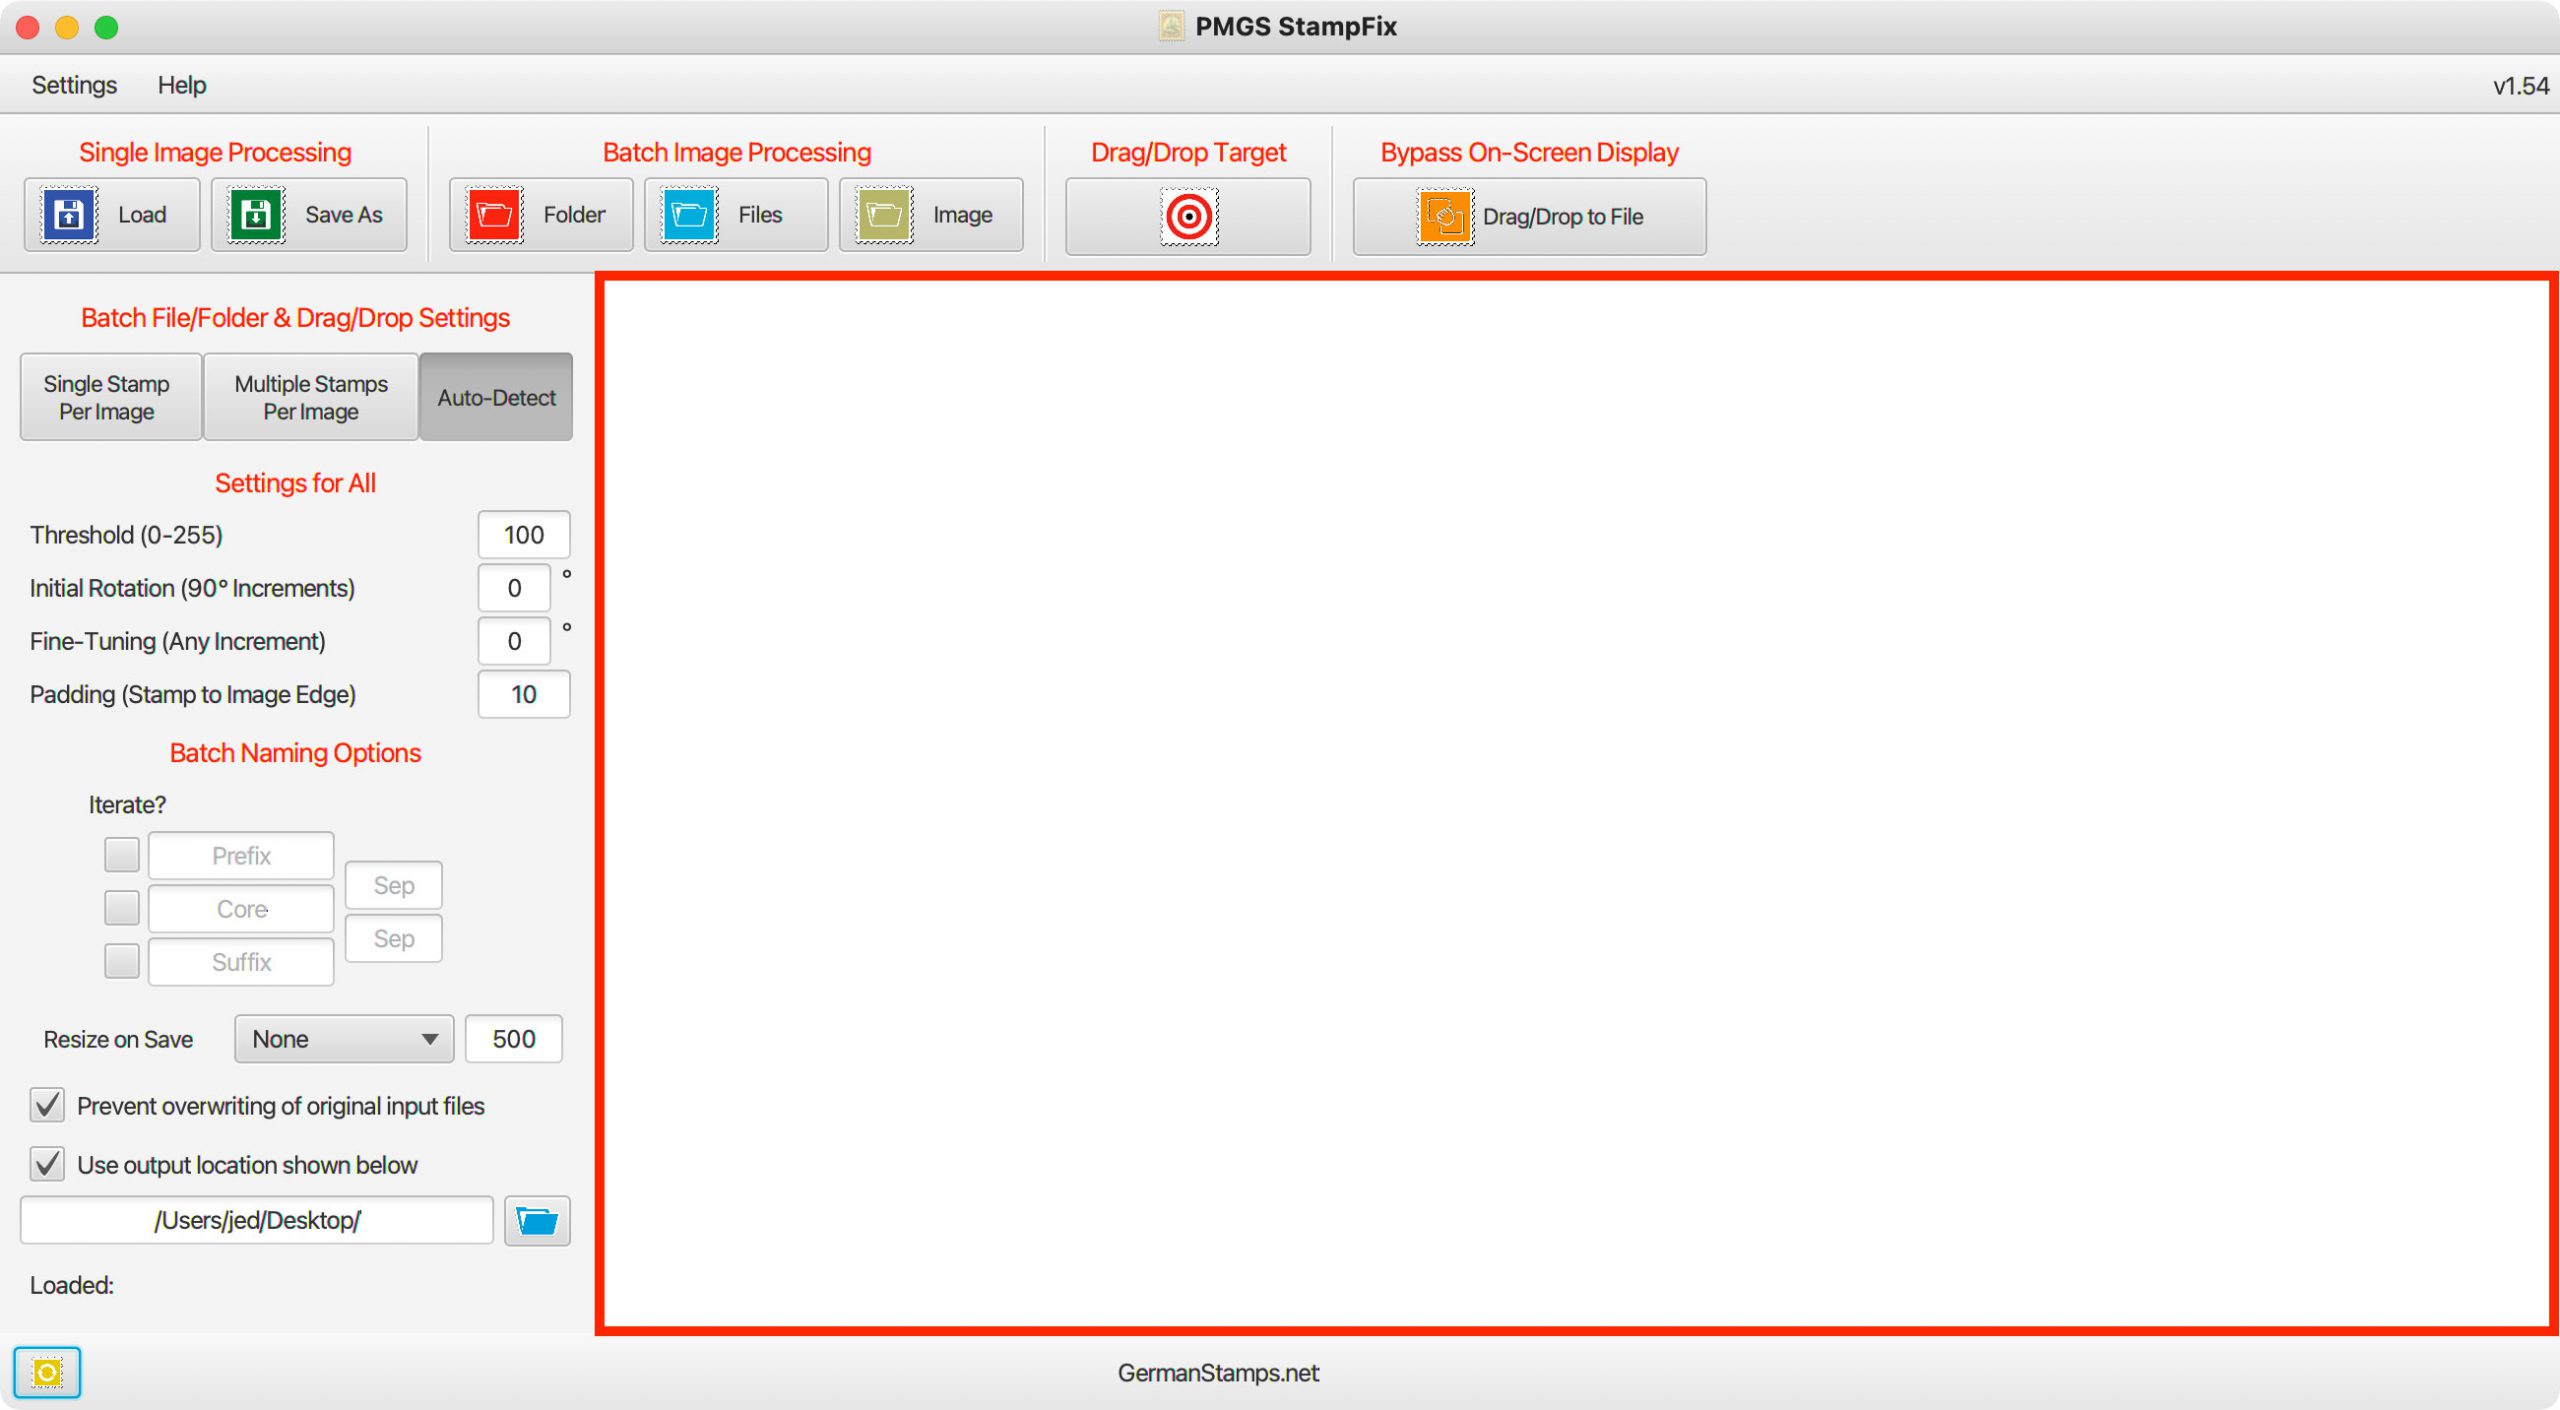
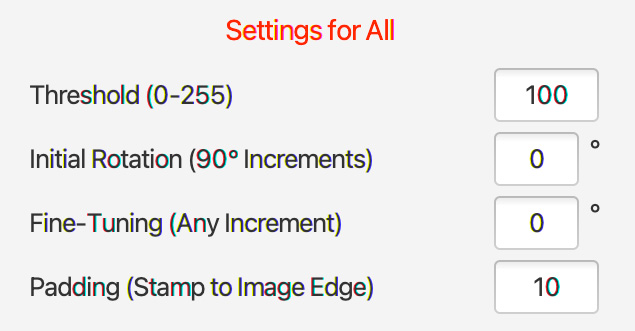
Settings for All
These settings control the image processing for all functions, with the exception of the Batch From Image Threshold (see here).
Threshold (0-255) — The Threshold setting is the most important setting in getting accurate results. This setting assists the app in finding the edges between the background color and the foreground images. The best Threshold value will vary based upon the color of the background and the color of the foreground image. If the difference in color between the background and foreground colors is large (for example, a stamp with white paper scanned on a black background), there can be a large window of “correct” settings (ex. any number from 75-125 might produce a correct bounding box count). However, if the difference in color between the background and the foreground image is smaller (ex. a stamp with dark-colored paper scanned on a black background), the window of “correct” settings might be very small (ex. only a setting of 75-80 might produce a correct bounding box count).
For black backgrounds, a “good” threshold setting will typically be in the 75-125 range, depending on the shade of black. For white backgrounds, it will typically be in the 200-225 range. Changing this value will force a recalculation of the bounding boxes using the new Threshold value.
Initial Rotation (90° Increments) — This setting is used to change the overall orientation of a stamp. It works in 90° increments, though the number entered doesn’t have to be a multiple of 90. The app will apply a rotation of the entered amount (ex. “45” will rotate the image 45° clockwise, “-60” will rotate the image 60° counter-clockwise), then straighten the resulting image to the nearest square orientation.
Fine-Tuning Rotation (Any Increment) — After the app rotates the image to the nearest square orientation, this setting is applied to rotate the final image. This is commonly needed if there is a long perforation or if the edges of an imperforate stamp aren’t square. The amount entered can be any number, including decimals (ex. “.2” will rotate the image .2° clockwise).
Padding (Stamp to Image Edge) — This setting sets the amount of space around the edge of the stamp after cropping. It is measured in pixels, so larger numbers will be necessary if the scan is in larger PPI/DPI.
Save Options
These options control the saving of files from the app
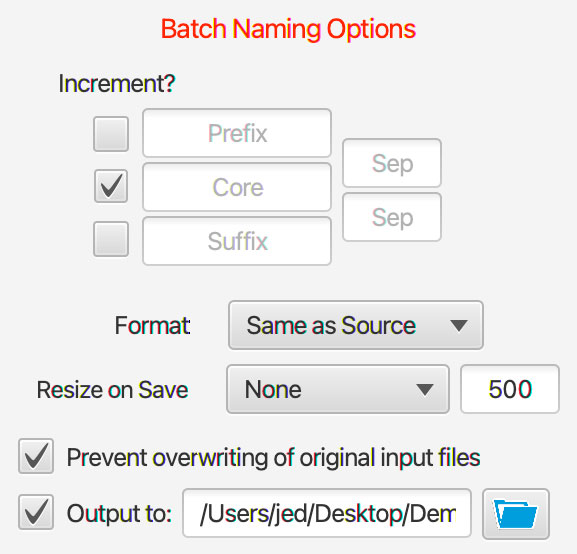
Batch Naming Options — These options allow you to set the prefix, core filename, and suffix for any batch-generated files. Additionally, you can add separators between those portions of the filename. The Increment option allows you to incerement the prefix, core filename, or suffix. The Increment function works as follows:
- If Increment? is checked and the box is blank, it will insert integers starting at 1. (ex. first stamp would be 1, next is 2, etc.)
- If Increment? is checked and the box contains only an integer (ex. 100), the integer will increment starting from that number. (ex. first stamp is 100, next is 101, next is 102, etc.)
- If Increment? is checked and the box contains mixed text — IOW, not a pure integer — (ex. 3A), it will append an integer incrementing from 1 (ex. first stamp would be 3A1, second would be 3A2, etc.)
- NOTE: when using Batch from Image (but not Batch Files or Folder), new unique filenames must be generated since you’re creating multiple files from one. New files automatically received integer filenames incrementing from 1 unless you override this behavior using the new options. If you leave all renaming checkboxes/blanks empty, the app will automatically check the box to increment the core so it can create core filenames iterating from 1.
The only time these settings are not applied is when the user uses the Save As function, as that function allows the user to manually enter an entire filename.
Format — This option allows you to set the file type of any outputted images.
Resize on Save — This option will resize any outputted image to a given size as entered in the accompanying blank, measured in percentage (Percentage) or pixels (all other options).
Prevent Overwriting of Original Input Files — If the location to which you have the app outputting files is the same as the folder in which your input files are stored, it’s possible for the original files to be overwritten with the outputted files. If you don’t wish to overwrite the input files, you can check this option. If this option is checked, the app will check to see if the outputted file’s name matches an existing file, and if so, appends a number to the outputted filename to avoid overwriting the existing file.
Output to: — If this option is not checked, the app will output files to the same directory as the input file. If checked, the app will output files to the location shown in the blank below. To change this location, click the folder button next to the blank and select a new output location.
Loaded
This line shows the name of the loaded file, if any.
Reset
This button resets the app to the state it was in when it was opened for this session, loading the user’s default settings and clearing the workspace.
Known Issues
When a new image is generated, the resolution information (ex. 300 dpi) is not always written to the new file. The ability of the app to write this information to the output file’s metadata is dependent upon the file types (.jpg, .png, etc.) of the input and output files.
In instances where the app is unable to read the input file’s resolution and/or write the resolution to the output file, this information is left blank in the output file’s metadata. When the user’s operating system shows the file information, it will see that the resolution information is missing from the metadata and assign a default value — commonly 72 dpi or 96 dpi — resulting in the image appearing to have been reduced in resolution during processing. This is not the case. The app does not, under any circumstances, change the resolution of the image from input to output. If a 300 dpi file is input, the outputted result will also be 300 dpi.
